I used to be weirdly snobby about chili. I wanted it to be darker and smokier, maybe feel like something a serious person would simmer for three hours while looking out a rainy window. Then I made Pioneer Woman’s chili as it is meant to be made: simple, beefy, a bit spicy, and unapologetically nice. It’s the kind of pot that gets ladled without ceremony, with watchers standing nearby pretending to do something ‘important’ while they sneak a taste.
This dish combines all the classic ingredients to bring some comfort, and it is more than enough to do the trick. Browned ground beef, onion and garlic, tomatoes, beans (if you’re on Team Beans), and that warm chili-spice perfume that hits the back of your nose in the best way. It’s not a stunt chili. This is the chili you make when you want all the guests to kick back, chat with their mouths full, and say, “Whoa, what did you put in this?”
Contents
TL;DR (Quick Summary)
- What it is: A classic, Pioneer Woman-style beef chili with tomatoes, beans, and a simple spice blend that tastes like home.
- Why it works: Browning the beef well builds flavor fast; tomatoes plus spice bloom create a thick, spoon-coating broth; simmering merges everything into one cozy voice.
- Timing: About 15 minutes active, 45 to 60 minutes simmering (longer is even better if you have it).
- Flavor profile: Savory, tomato-rich, mildly to moderately spicy, with a gentle sweetness from onion and tomato paste.
- Key tips: Don’t rush the browning, toast the spices briefly, and adjust thickness with a small splash of broth or a longer simmer with the lid cracked.
- Best use: Weeknight dinner, game day, or the sort of pot you bring to a friend who just had a baby and needs food that feels like a hug.
Ingredients
It has some charm and pantries plus meat. Most important is the quality of the browning on the beef and picking a chili powder that you enjoy (some are warm and cocoa-ish, others are sharp and paprika-forward, while others still taste like a dusty attic). Avoid the attic).
- Ground beef (2 pounds): 80/20 gives you flavor and richness; you can drain some fat if needed.
- Onion (1 large), diced: The sweet backbone. Dice it small so it melts into the chili.
- Garlic (3 to 5 cloves), minced: Add after onion so it doesn’t scorch and go bitter.
- Crushed tomatoes (1 can, 28 ounces): The main body. If you use diced tomatoes, expect a chunkier, brighter result.
- Tomato sauce (1 can, 15 ounces): Smooths the texture and deepens tomato flavor.
- Tomato paste (2 tablespoons): Adds concentration and a little caramel depth.
- Kidney beans (2 cans, 15 ounces each), drained and rinsed: Optional in some chili circles, but very Pioneer Woman in spirit. They make it hearty and spoonable.
- Chili powder (2 to 3 tablespoons): Your main spice. Start at 2; you can always add more.
- Ground cumin (2 teaspoons): Earthy warmth that reads like “chili” even before it simmers.
- Paprika (2 teaspoons): Sweet warmth and color. Smoked paprika shifts the whole pot into campfire territory.
- Oregano (1 teaspoon, dried): Optional but nice; it adds a faint herbal twang.
- Cayenne (pinch to 1/2 teaspoon): Heat control. Go slowly unless you like surprises.
- Salt and black pepper: Season in layers. Chili wakes up dramatically with enough salt.
- Beef broth or water (1 to 2 cups as needed): To loosen the texture to your liking.
- Optional “rounding” ingredient: 1 to 2 teaspoons brown sugar, or a drizzle of honey, if your tomatoes are especially sharp.
Master Ratio (Easy To Scale)
- Meat: 1 pound ground beef
- Aromatics: 1/2 large onion + 2 cloves garlic
- Tomatoes: 14 ounces crushed tomatoes + 8 ounces tomato sauce + 1 tablespoon tomato paste
- Beans (optional): 1 can (15 ounces), drained and rinsed
- Spices: 1 to 1 1/2 tablespoons chili powder + 1 teaspoon cumin + 1 teaspoon paprika
- Liquid as needed: 1/2 to 1 cup broth or water
- Salt: start with 1 teaspoon kosher salt per pound, then adjust
Example: Cooking for two? Use 1 pound of beef and then halve everything. You will still receive a significant amount, and the leftovers won’t seem like a second job to complete. Feeding a crowd? Use a bigger Dutch oven and double it, and anticipate that people will “just have a little more.”
Ingredient Choices That Change Flavor
| Ingredient Choice | Option | What Changes in the Chili | Best For |
|---|---|---|---|
| Ground meat | 80/20 beef | Richer, silkier mouthfeel; more drippings for flavor | Classic, cozy chili with big beef presence |
| Ground meat | 90/10 beef or turkey | Cleaner flavor; can taste a little lean unless you add oil and season well | Lighter weeknight version |
| Tomatoes | Crushed tomatoes | Thicker, cohesive texture | Chili you can scoop onto a baked potato |
| Tomatoes | Diced tomatoes | Chunkier, brighter, slightly looser | “Soupier” chili with more tomato bite |
| Paprika | Sweet paprika | Warm, rounded, classic | Pioneer Woman baseline flavor |
| Paprika | Smoked paprika | Smoky, barbecue-adjacent depth | When you want a little drama without extra work |
| Beans | Kidney beans | Traditional, sturdy, holds shape | Hearty bowl chili |
| Beans | Pinto or black beans | Creamier (pinto) or earthier (black) | Southwest-leaning variations |
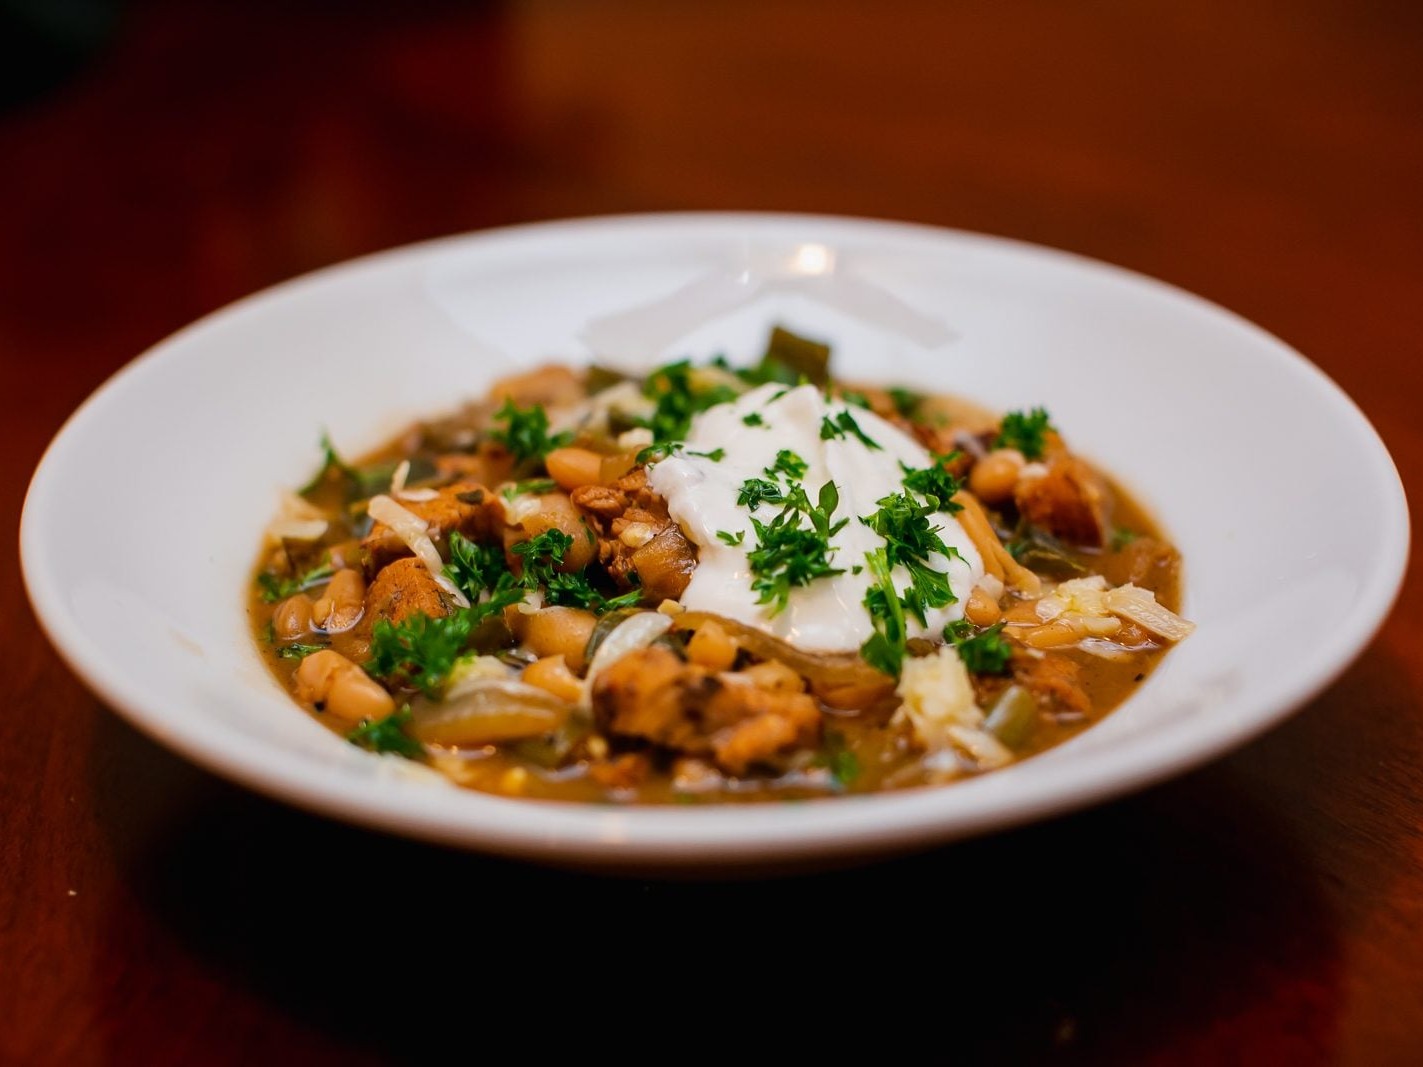
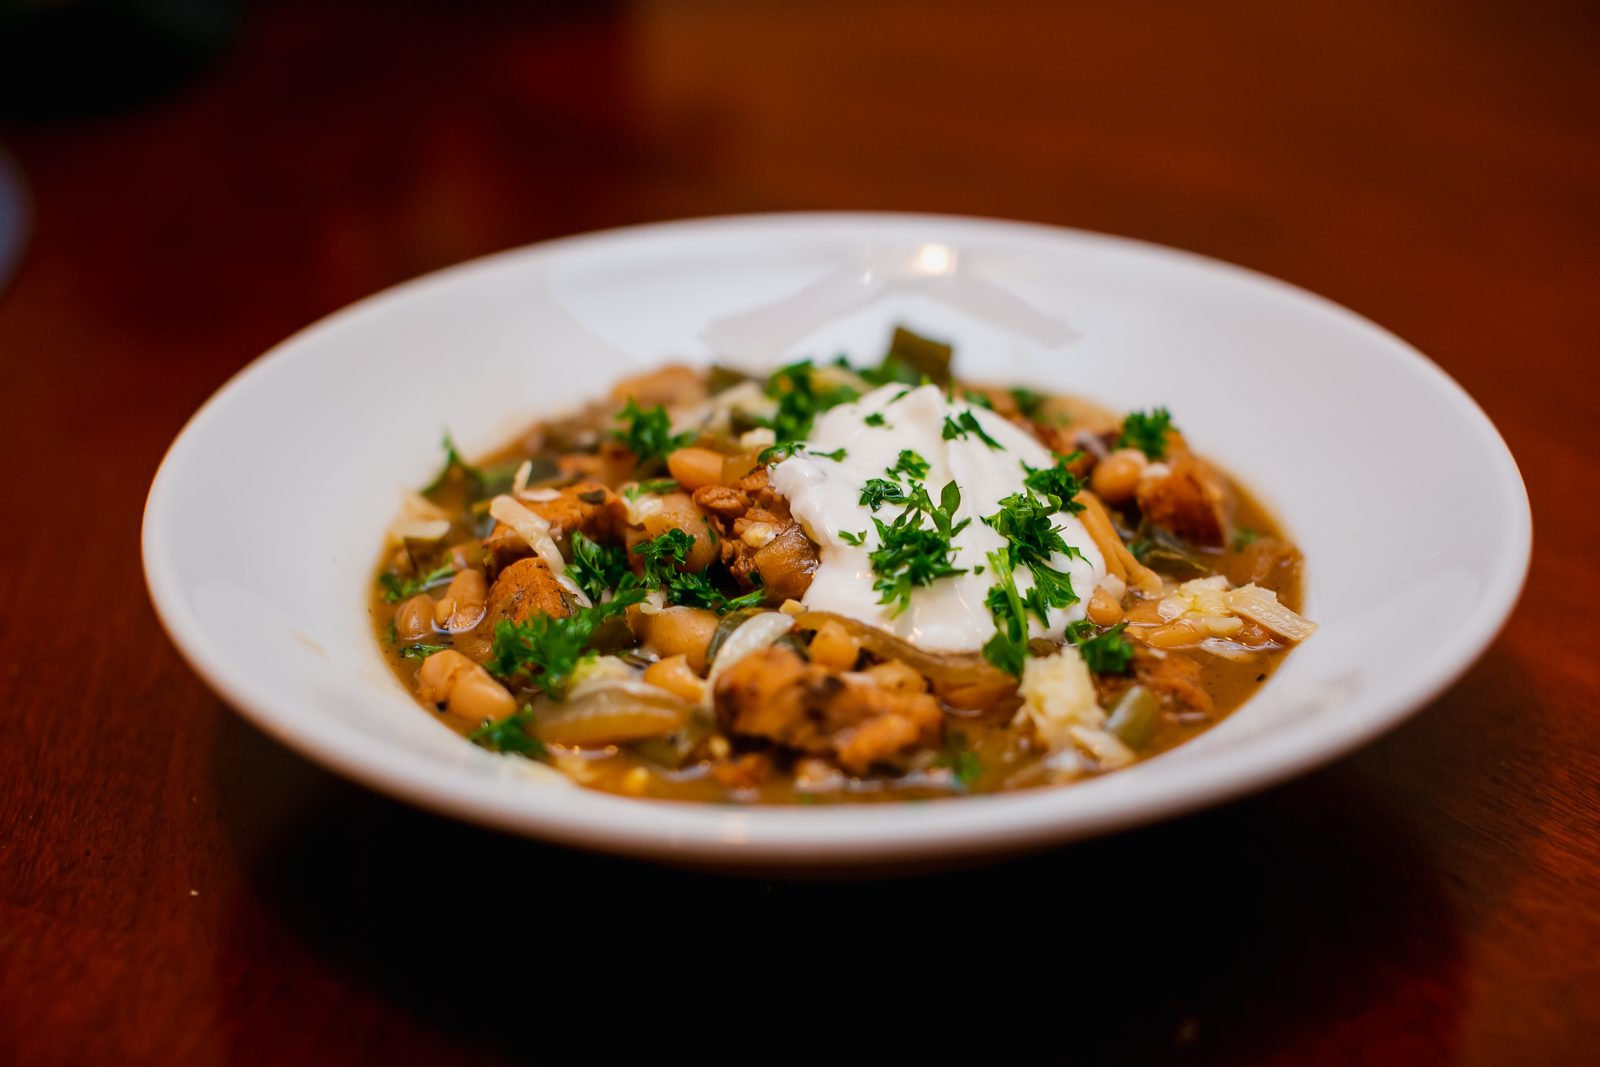
Toppings That Make It Feel Like a Party
- Sharp cheddar: Grate it yourself if you can; it melts like a dream.
- Sour cream: Swirls into the broth and softens heat.
- Green onions or red onion: Crunchy contrast.
- Cilantro: Not for everyone, but when it works it really works.
- Crushed tortilla chips or saltines: The underrated move. Adds salt and texture.
- Pickled jalapeños: Bright, briny heat that cuts richness.
Instructions
1) Cook the beef thoroughly.
Place a large Dutch oven or heavy pot on the stove and turn the heat to medium-high. Add the ground beef and cook, breaking it up with a wooden spoon as you go. It’s not enough for some pieces to just turn gray; real browning is desired. That is where the complex, meaty taste exists. If there’s a lot of fat, remove some, but leave a couple of tablespoons for the onions to cook in.
2) Add onion, then garlic.
Mix in the diced onion and cook for about 5 to 7 minutes until softened and beginning to turn translucent. Add the garlic and cook for 30 to 60 seconds, or until you can smell the aroma. (For a second, I feel like I really know what I’m doing.)
3) Bloom the spices.
Add chili powder, cumin, paprika, oregano (if using), and cayenne. Stir continuously for around 30 seconds to 1 minute. The spices need to smell more vibrant, warmer, and with more intensity. If they begin to stick, splash in a tablespoon of broth or water and continue stirring.
4) Make the tomato base. Add the tomato paste and cook for 1 minute letting it get a little darker. Include crushed tomatoes and tomato sauce. Stir thoroughly to incorporate the browned bits stuck to the bottom of the pot.
**5) Simmer then decide on your texture.**
Gently simmer the pot. If you like it a little looser, add 1 cup of beef broth or water (you can add more later). Simmer covered on low heat, stirring occasionally, for 45 minutes. If you can, I’d suggest going a little longer – an hour and a half feels a lot rounder and more integrated, like the flavors have finally stopped arguing.
6) Mix in beans and complete the seasoning.
Add the beans you have drained and rinsed to the pot and let them cook on a low heat for another 10 to 15 minutes. For taste adjustments, add more salt, a bit more chili powder, a pinch of sugar if it’s too sharp, and a little extra cumin if you want it to be more earthy. If the mixture is too thick, add the broth a little at a time. If it is too thin, let it simmer uncovered until it behaves.
7) Rest and serve.
Turn off the heat and let the chili sit for 10 minutes. This is not obligatory, but assists. Scoop some out into bowls, then go crazy with the toppings.
Popular Variations
- No-bean version: Skip the beans and reduce broth; simmer a bit longer for thickness.
- Three-bean “church potluck” chili: Mix kidney, pinto, and black beans (total 3 cans). Add a touch more salt and chili powder.
- Smoky version: Use smoked paprika and add 1 to 2 teaspoons chipotle in adobo (minced) for a slow, deep heat.
- Beer chili: Replace 1 cup broth with 1 cup lager; simmer longer to mellow the bitterness.
- Extra veggie version: Add diced bell pepper with the onion; add corn near the end for sweetness.
- Thicker “chili for chili dogs”: Use less broth and simmer uncovered until it’s spoon-sticky.
Pairing And Serving Ideas
- Cornbread: Sweet or skillet-style, ideally with butter that melts instantly.
- Baked potatoes: Split, fluff, then drown in chili and cheddar. It’s absurdly satisfying.
- Chili cheese fries: Slightly chaotic, deeply beloved.
- Rice: White rice turns a bowl into something you can stretch for lunch the next day.
- Simple salad: Crunchy greens with a sharp vinaigrette to cut the richness.
- Chips and salsa on the side: Because people like to snack while they “wait for chili,” even when the chili is already done.
Troubleshooting And Pro Tips
- My chili tastes flat: Add salt first. Then add a squeeze of lime or a teaspoon of vinegar to sharpen the edges.
- It’s too spicy: Stir in sour cream at serving, add more beans, or simmer in a little extra tomato sauce. Dairy helps, but dilution helps more.
- It’s too thin: Simmer uncovered, stirring more often. You can also mash a small scoop of beans and stir back in.
- It’s too thick: Add broth a splash at a time. Let it simmer 5 minutes after each addition so you don’t overshoot.
- Greasy on top: Spoon off fat, or chill and remove the solidified layer later. (Chili is forgiving like that.)
- Spices taste raw or harsh: You probably didn’t bloom them long enough, or the chili needs more time. Give it another 20 minutes at a gentle simmer.
- Make it taste like “more”: A teaspoon of Worcestershire sauce or a small pinch of cocoa powder can deepen the bass notes without changing the vibe.
Nutrition And Storage Basics
The nutrition in Pioneer Woman’s chili varies depending on the type of beans and beef you use. Because of the 80/20 beef and beans, there is a lot of protein and a good amount of fat that helps it feel more like a meal rather than just “a bowl of something.” Chili is meant to have a comforting cling and the two main contributors to that mouthfeel are fat and starch. If you go leaner or use less beans, you’ll change the macros, but the biggest change you’re going to feel is the mouthfeel.
Storage is the easy part. Once you have cooled the chili, store it in airtight containers in the refrigerator for up to four days. It also freezes well for around 3 months. You can either stovetop reheat by adding a bit of broth or water to loosen it, or microwave in intervals and stir in between. As with many soups and braises, the flavors will develop a little more overnight, as if the spices have settled into the tomatoes like they’ve paid rent.
Examples
Example 1: The weeknight rescue. I once began this at 6:10 p.m. With a slight panicked energy of “everyone is hungry and I have done nothing.” By 715 the house smelled of cumin and onions and my child was smashing tortilla chips into their bowl like a little line cook. The key was to not overthink it: brown the beef, bloom the spices, and then simmer it while you handle the other tasks.
Example 2: The potluck ‘flex’ that isn’t a flex. One time, a neighbor invited me to a game day and asked me to bring chili. I did this, arranged toppings in separate bowls, and watching it all go while people debated if beans “belong.” One person even asked for the recipe, which is the only measure of success I care about. To me, the pot coming home with a polite smear left on the bottom was a compliment.
Actionable Steps / Checklist
- Buy ground beef you actually like (80/20 if you want classic richness).
- Choose a chili powder that smells fresh and warm, not dusty.
- Brown the beef until you get real color.
- Cook onion until soft; add garlic briefly so it stays sweet.
- Bloom spices for 30 to 60 seconds.
- Simmer at least 45 minutes; longer if you can.
- Taste for salt and acidity at the end, not just heat.
- Set up toppings so everyone can build their own ideal bowl.
Glossary
- Blooming spices: Briefly cooking dry spices in fat to wake up their aroma and deepen flavor.
- Deglaze: Using liquid (tomatoes, broth, water) to loosen browned bits from the bottom of the pot.
- Simmer: Gentle bubbling, not a rolling boil; helps flavors meld without toughening meat.
- Reduce: Simmering uncovered to evaporate liquid and thicken the chili.
- Season in layers: Adding salt and spices at multiple points so the dish tastes integrated, not sprinkled-on.
FAQ
**Is Pioneer Woman’s chili spicy?**\n\nIf you keep the cayenne modest, it’s more warm than fiery. Chili powder blends can vary greatly, so start with less and build up. You can always increase the spice level on the table with jalapeños or hot sauce.
Do I need to use beans?
No. You can skip them and let them simmer longer for thickness. If you want that hearty, classic bowl chili feel, beans help and they’re very much in the Pioneer Woman lane.
Can I make it in a slow cooker?
Yes, but you will have to still brown the beef and cook the onion and garlic first. After that, place everything into a slow cooker with the other ingredients and let it cook on low for 6 to 8 hours (if you want the beans to be a bit firmer, add them in the last hour).
What are some methods to thicken chili without using flour? You can simmer it uncovered, mash some beans into the chili, or add another tablespoon of tomato paste. The slow passage of time will work best here.
What do you think has the best topping combo?
I would say my top three are sharp cheddar, sour cream, and green onions. If I get five, include crushed tortilla chips and pickled jalapeños.
Final Thoughts
Pioneer Woman’s chili is the type of recipe that slowly makes it into a permanent place in your recipe rotation. It is not attempting to be the most technical, rarest, or smokiest chili in existence. It is trying to be the pot that arrives, does its job, and makes the team feel taken care of. To be honest, that chili is what I want most nights.