I used to be scared of biscuits. I own three rolling pins, so this is pretty embarrassing. I understand that they’re not super difficult, but when you have a handful of different options that you can choose to make, there seems to be a pretty high degree of control involved and biscuits are one of them.
Biscuits have a tendency to be overworked and turn into polite dinner roll. Or they don’t rise, and instead of nice fluffy pancakes you’re left with sad little ones. When you pull out a batch that is tall and soft, with a crack that steam comes out of, you feel like you should be lucky and skilled.

I have tried several recipes for buttermilk biscuits but I keep returning to this one because it fascinates me as it consistently does the best job. The recipe uses cold butter and only a few folds to make layered biscuits.
It doesn’t require excessive mixing. These biscuits are perfect for calm Sunday mornings. They’re also great for busy weeknights I want something warm and comforting (to be honest, I want something to justify the butter and jam I will shovel into my mouth standing at the counter).
Contents
Before You Start: The Gist
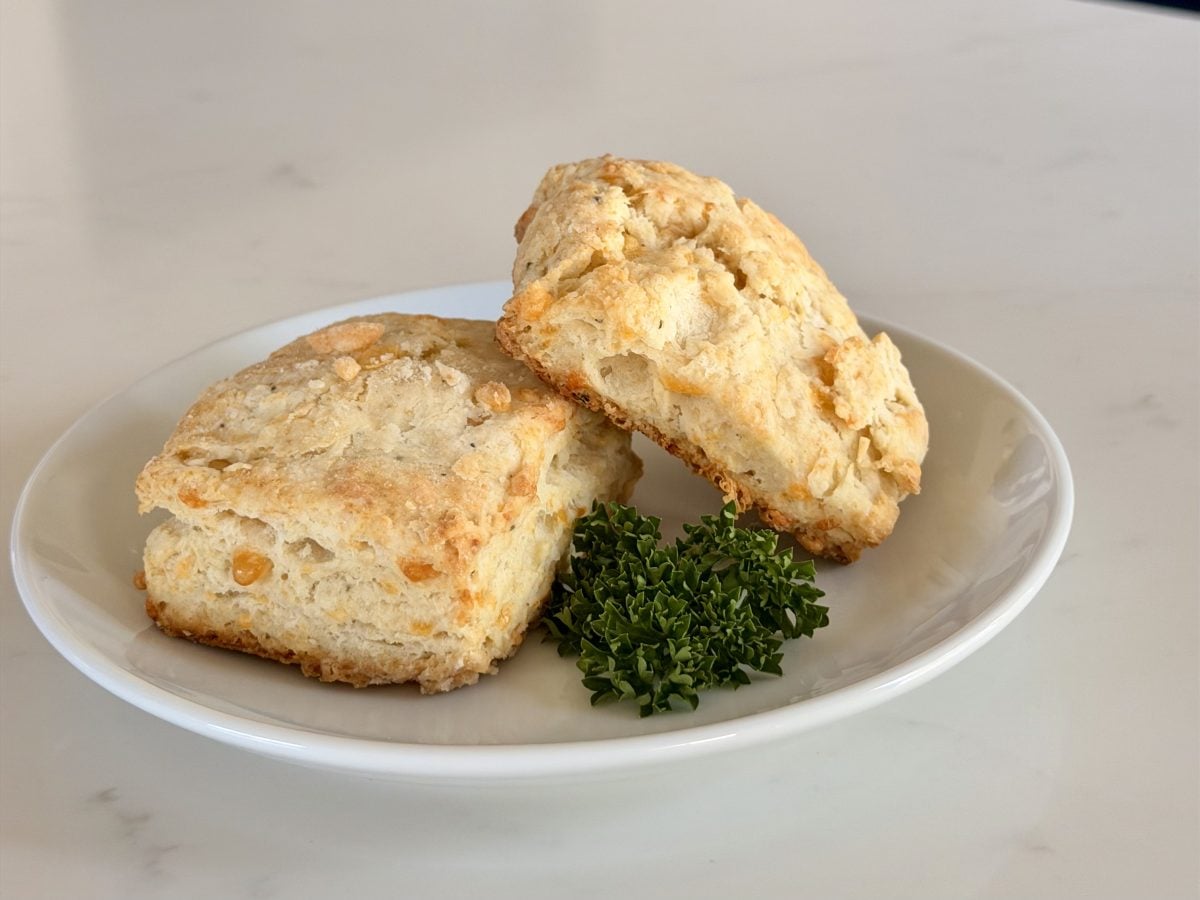
- What you’re making: Classic, flaky buttermilk biscuits, crisp edges, tender centers, buttery pull-apart layers.
- Why it works: Hot oven and cold butter means the lift is created using steam. With gentle mixing the gluten is kept relaxed. Folding the batter quickly creates and builds layers.
- Time: Depending on how warm your kitchen is, you might want to add 10 minutes to the baking time. You will need to chill the dough for 10 minutes before baking. It will take about 15 minutes of prep time, and in total, about 12-16 minutes of baking time.
- Flavor profile: Not sweet or cakey, but buttery and creamy, with clean wheat and tangy buttermilk.
- Key tips: For the best rise, keep everything cold, don’t overwork the dough, and cut down straight (no twisting).
- Best oven temp: 450°F / 232°C is hot enough to puff up before the butter has fully melted.
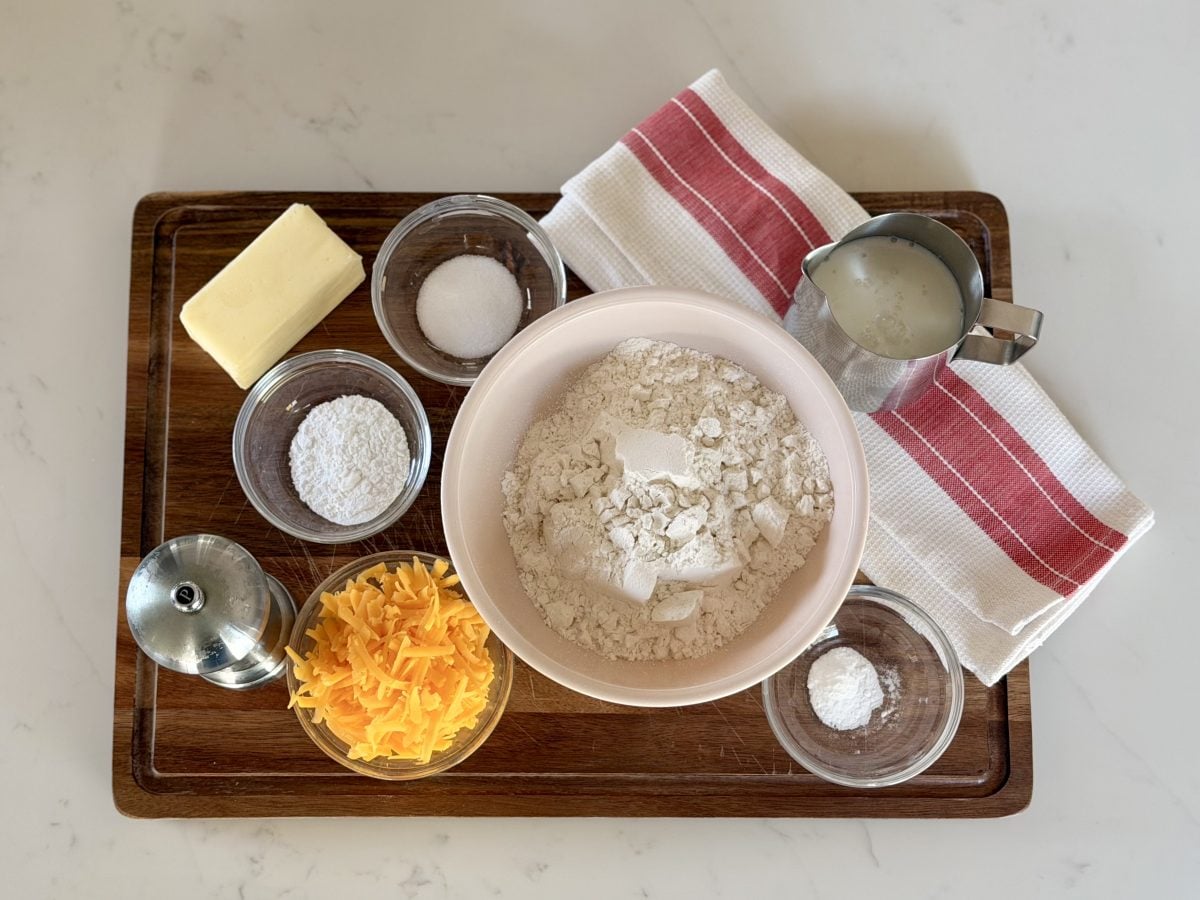
Ingredients
Even though biscuits can be made using a small number of ingredients, the effects of these ingredients can be very large. Let’s examine these effects, and why they are important.
- All-purpose flour: The starting point for tender biscuits that have just enough structure to rise is . If you are only going to change one thing don’t change the flour until you have made the recipe once.
- Baking powder: The Primary Lift. Use fresh baking powder; old baking powder is the silent killer of tall biscuits.
- Baking soda: A small boost that works with buttermilk to create a better rise and improve browning.
- Fine salt: Makes the butter actually taste like butter (and keeps the biscuit from just tasting like ‘warm flour’).
- Cold unsalted butter: The engine of flake. If you use Unsalted, you have control; if you use salted, reduce added salt.
- Cold buttermilk: Taste + Softness. The gluten and baking soda are positively influenced by acidity.
- Optional sugar: Not for sweetness, really, more for rounding out the flavor and deeper browning.
Master Ratio (Easy To Scale)
- Flour: 2 cups (260 g)
- Butter: 1/2 cup (113 g), cold
- Buttermilk: 3/4 cup (180 g/ml), cold (unless a splash is needed)
- Leavening: 1 tablespoon of baking powder and a quarter teaspoon of baking soda
- Salt: 1 tsp fine salt
If you’ll divide the food again, raise the numbers, use two sheets (ex. 4 cups of flour, 1 cup of butter, 1 1/2 cups of buttermilk, etc.). You can lower the numbers by half to make a smaller batch. Just keep the oven hot and keep your butter colder than your pre-coffee feelings.
Ingredient Choices That Change Flavor
| Ingredient Choice | What It Changes | Best For | Notes |
|---|---|---|---|
| All-purpose flour | Balanced tenderness and lift | Classic, reliable biscuits | Stick with it if you’re learning the feel of the dough. |
| White lily / low-protein flour | Extra tenderness, softer crumb | Ultra-tender Southern-style biscuits | You may need a touch less buttermilk; dough can feel slightly stickier. |
| Partial whole wheat (swap 1/2 cup / 65 g) | Nuttier flavor, slightly denser | Hearty breakfast biscuits | Add 1-2 tbsp extra buttermilk if dough seems dry. |
| Buttermilk (real) | Tang + tenderness + browning | Best flavor and texture | Use cold. Full-fat is my preference. |
| DIY “buttermilk” (milk + lemon/vinegar) | Some acidity, less complexity | Emergency situations | Works, but the flavor is flatter; rest 5-10 minutes before using. |
| Butter vs. shortening (swap up to half) | Butter = flavor; shortening = taller, softer | Butter-lovers vs. height-chasers | I’m team butter. Half shortening can be useful in very warm kitchens. |
Optional Add-Ins (Use Restraint)
- Freshly cracked black pepper: 1/2 tsp is a good amount for biscuits that will be paired with gravy.
- Chives or scallions: 2 tbsp finely sliced; gives them a brunchy vibe without overdoing it.
- Cheddar: Grated cheese should be kept cold, it will smear into the dough. 3/4 cup (about 85 g).
Instructions
Yields: 8 to 10 biscuits (using a 2.5 inch / 6 cm biscuit cutter)
Temperature: 450 F / 232 C
Equipment: Sheet pan lined with parchment paper (or a cast iron skillet if you want close-set sides)
1) As you keep your cool, go ahead and start preheating the oven to 450°F / 232°C. If your butter isn’t cold from the fridge, pop it in the freezer for 10 minutes. Chilling the buttermilk is also an option, no judgement if you’re taking your time and it’s warm in your kitchen. Buttermilk biscuits are like biscuits, they are very straight to the point and emotionless.
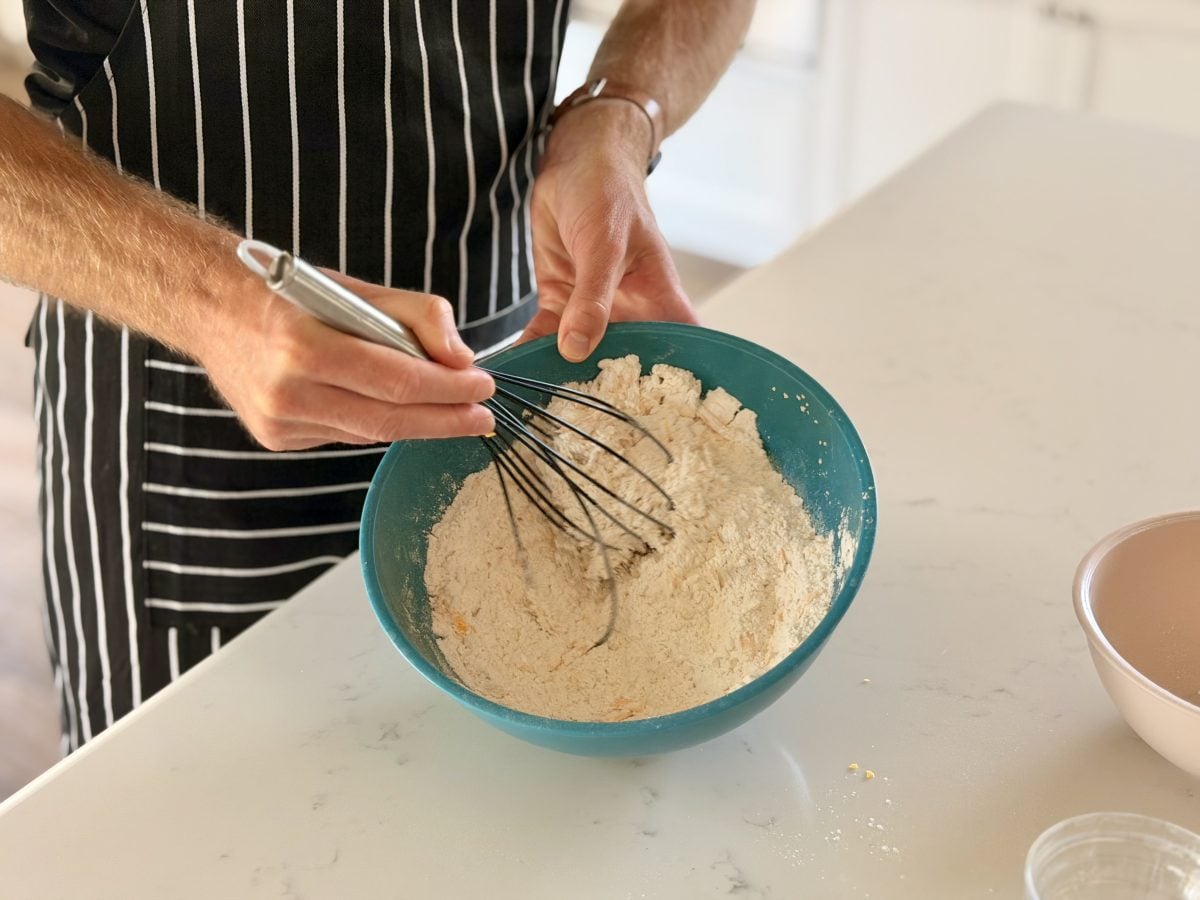
2) Combine the ingredients of the dry mixture. In a big bowl, combine and beat 2 cups (260 g) of all-purpose flour, 1 tablespoon of baking powder, 1/4 teaspoon of baking soda, 1 teaspoon of fine salt, and 1 teaspoon (optional) of sugar. Whisking helps to avoid any pockets of salt, and evenly distribute the leavening agents.
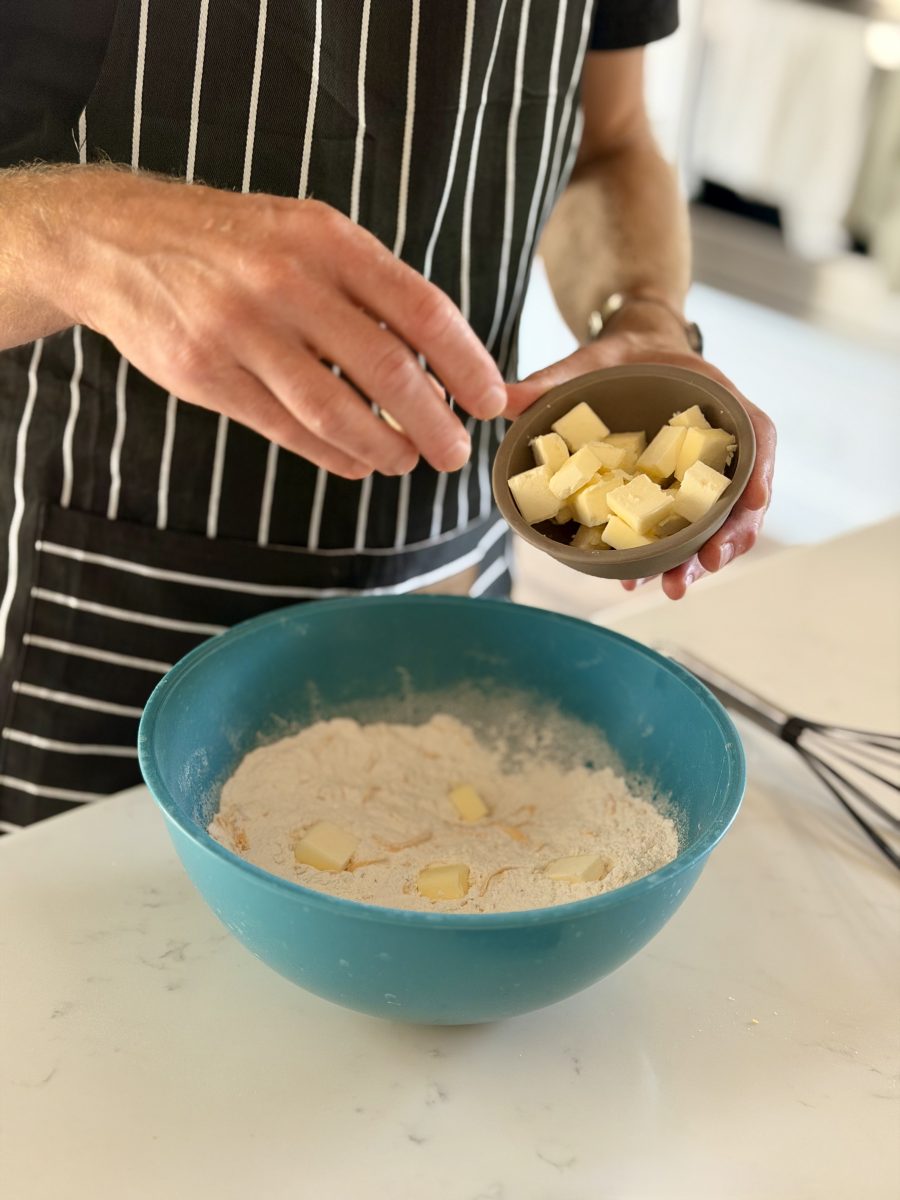
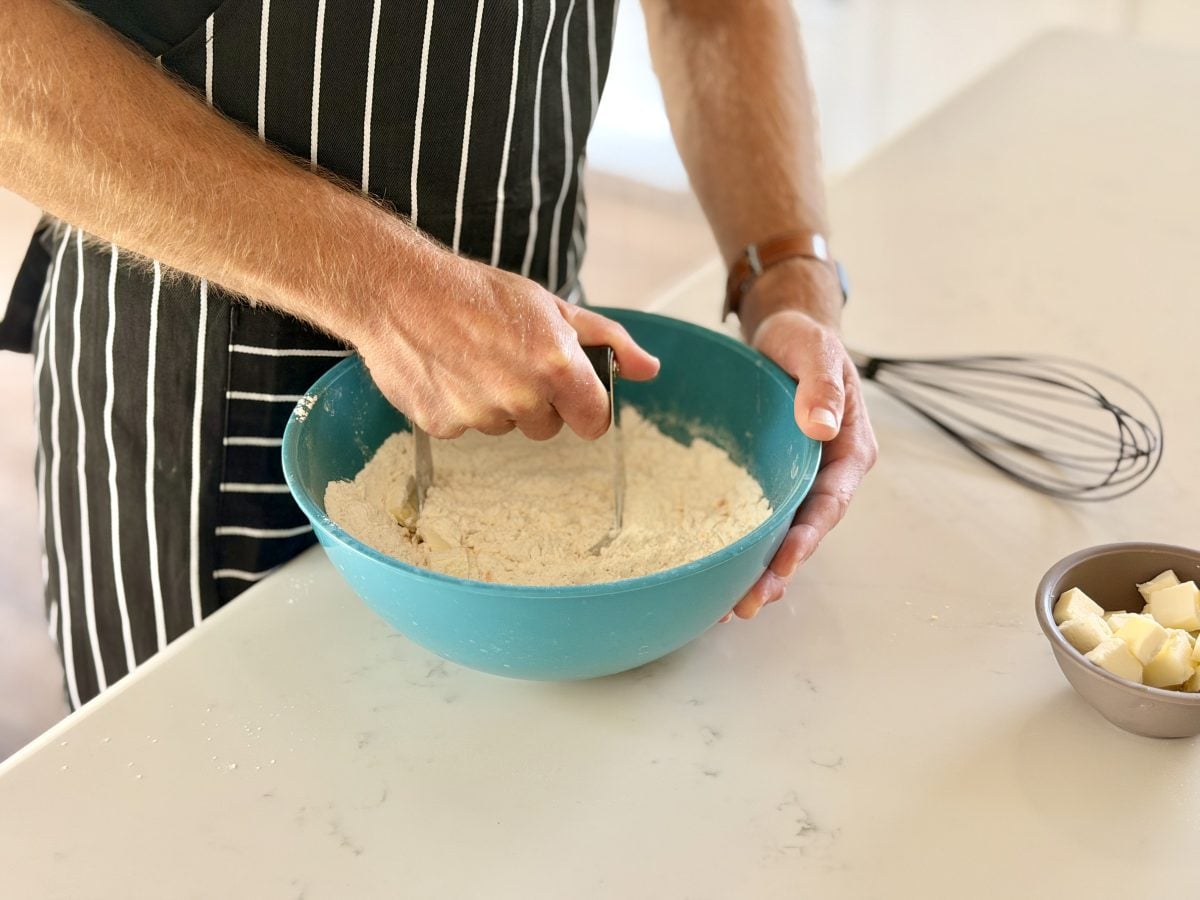
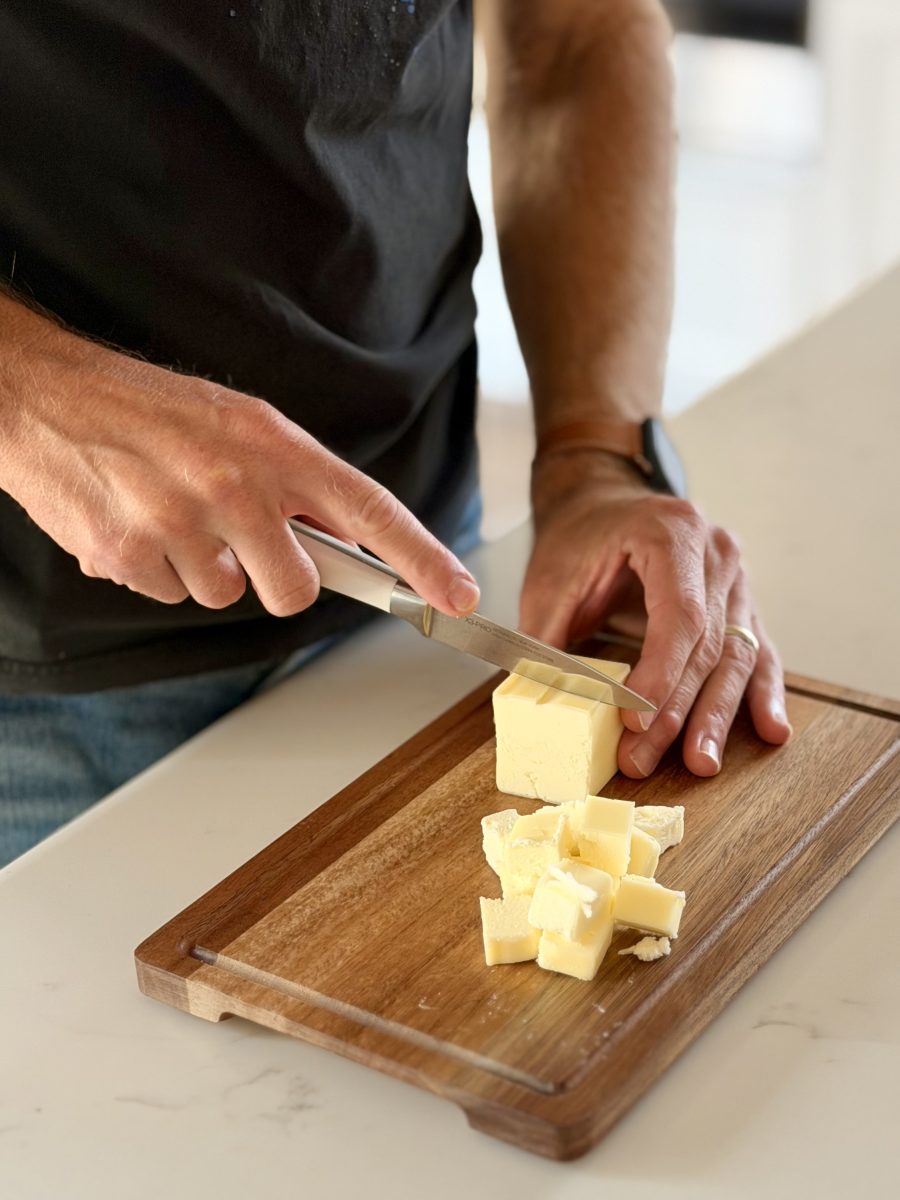
3) For the butter, keep mixing until it seems shaggy and ‘promising’. Add in 1/2 cup (113 g) of cold unsalted butter, diced. Using your fingertips, a pastry cutter, or two knives, mix the flour until you have created a combination of small pieces that are about the size of peas along with some that are flatter and look like shards. Shards are the most ideal because they will create layers. If the butter is starting to soften, cease mixing and put the bowl into the fridge for 5 minutes. I have opened my freezer and stood in front of it like a raccoon, and it has worked for me before.
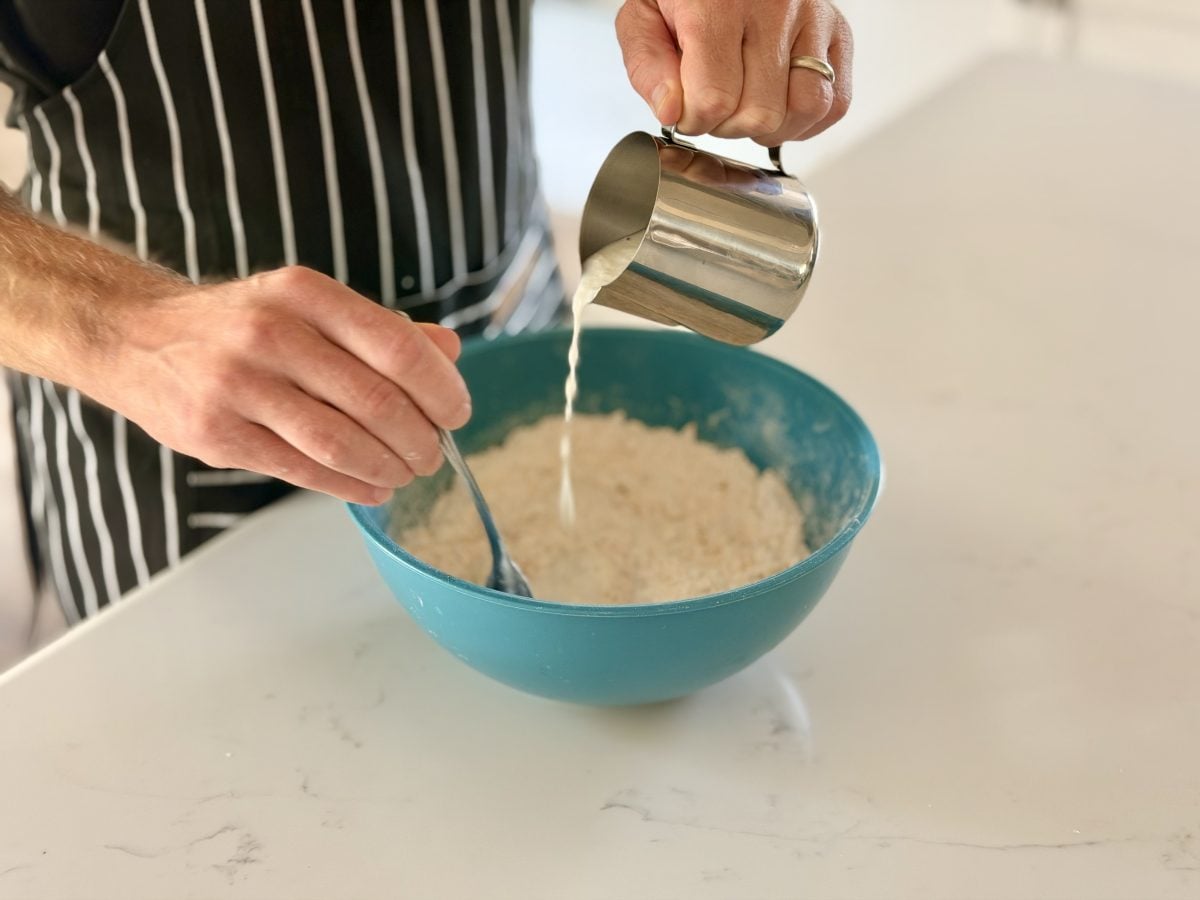
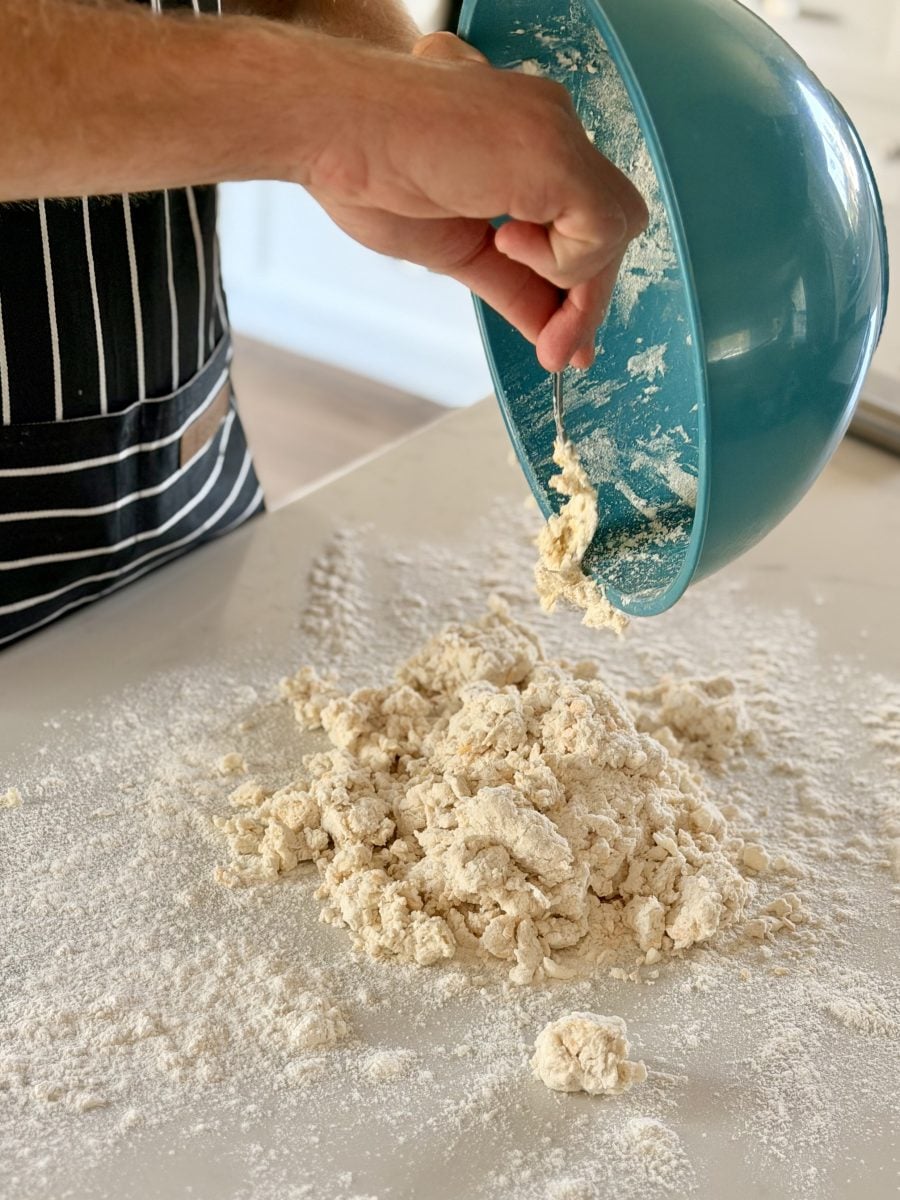
4) Add the buttermilk and stop mixing earlier than you think you should. Add 3/4 cup (180 g/ml) of cold buttermilk. Using a fork, mix until the Buttermilk starts to stick to the other ingredients and combine to form a shaggy mixture with some dry ingredients still visible. If it feels too dry, add another 1 to 2 tablespoons of buttermilk. It is alright for the dough to be messy, and if you clean it up too much, you will have hard biscuits.
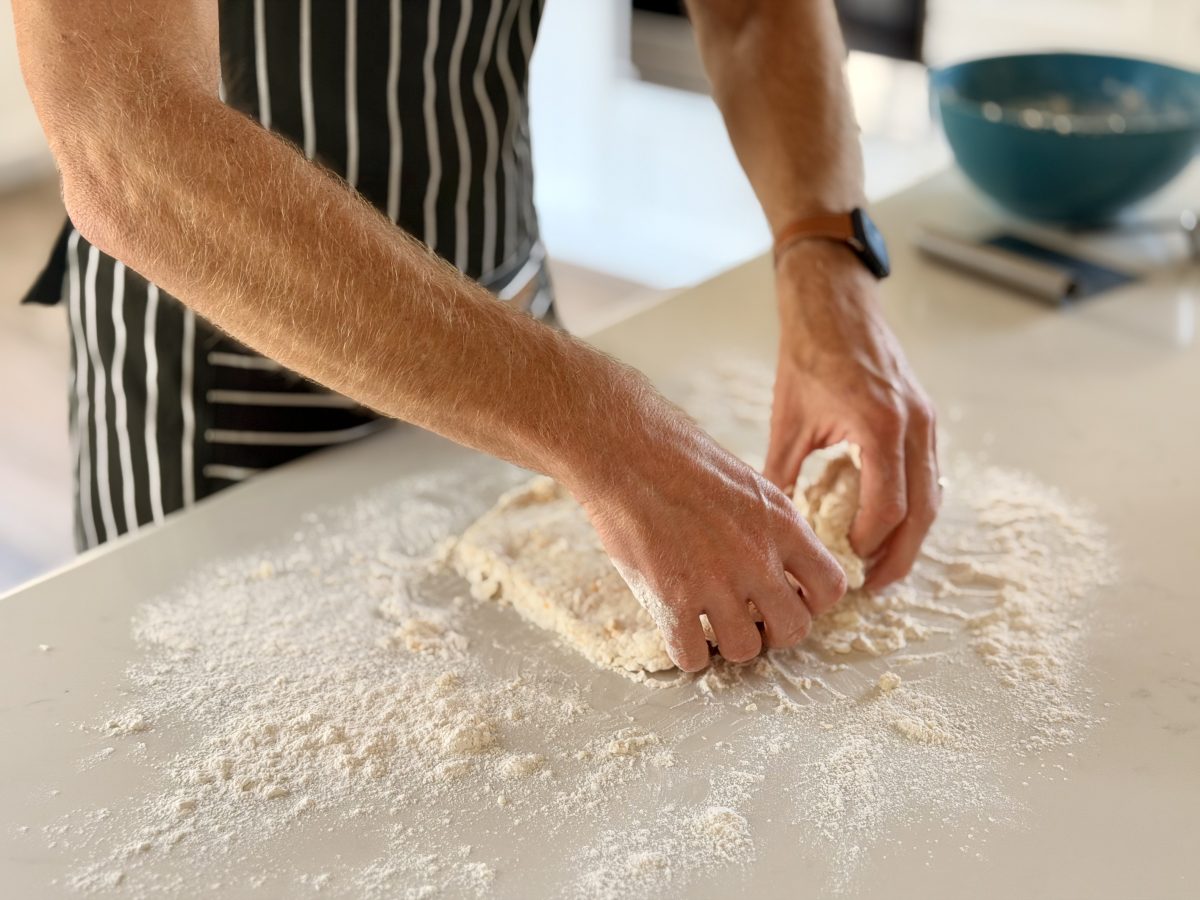
5) Layered folding (this is the easiest of the “fancy” steps). Roll out some dough on a floured surface to about three-quarters of an inch thick in the shape of a rectangle. Fold it into thirds like a letter. Now, rotate it 90 degrees, give it a light pat, and fold it again. You can do this two to three times in total, but don’t forget, you are not kneading the dough, you are mounding it.
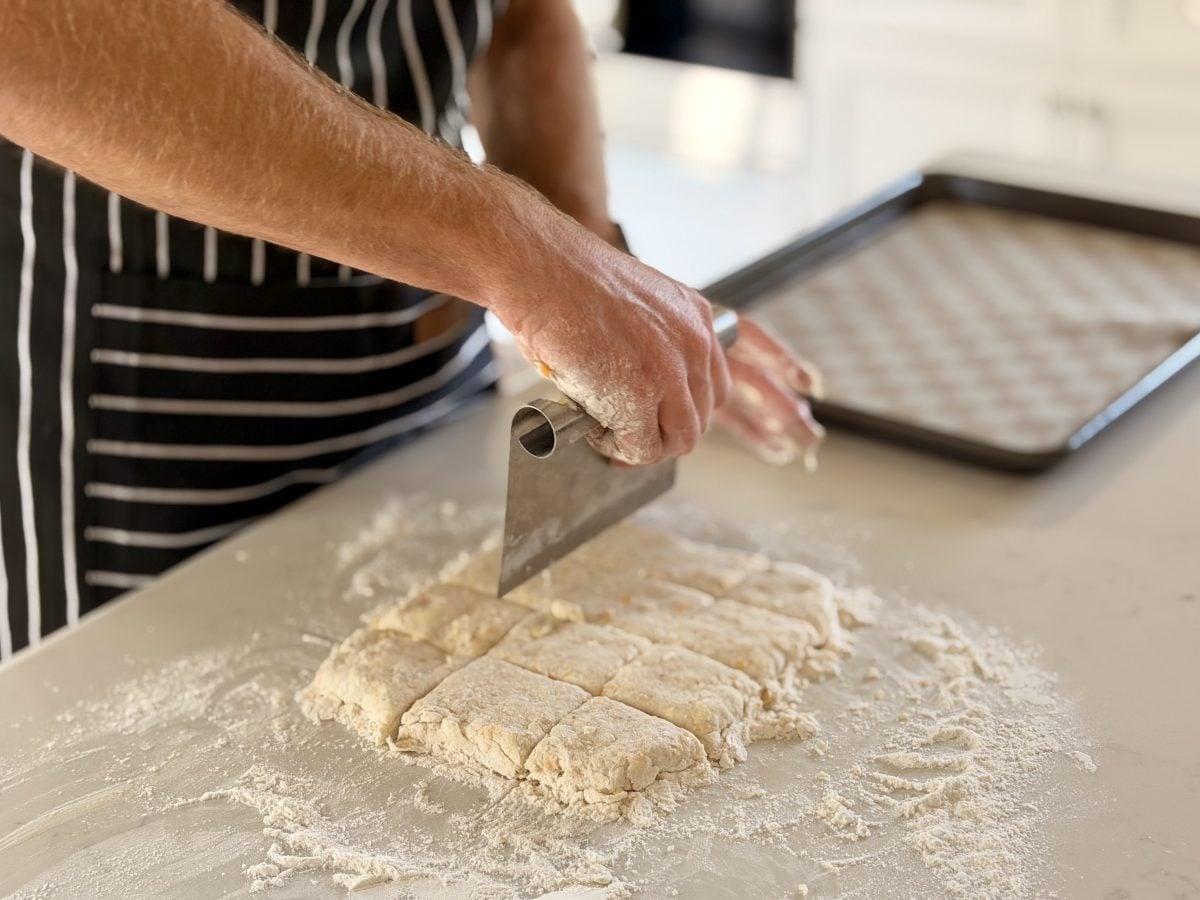
6) Slice the dough into strips. Then, flatten the dough so that it is roughly 3/4-1 inch thick (around 2.0-2.5 cm). Before you cut the dough, make sure the biscuit cutter is dusted with some flour. Then, cut and remove the dough. Avoid twisting the cutter as this will seal the dough edges which makes the biscuits less puffy. It’s pretty petty. Take the leftover pieces of dough and combine them; the second batch won’t be as dramatic, but it will taste just as good.
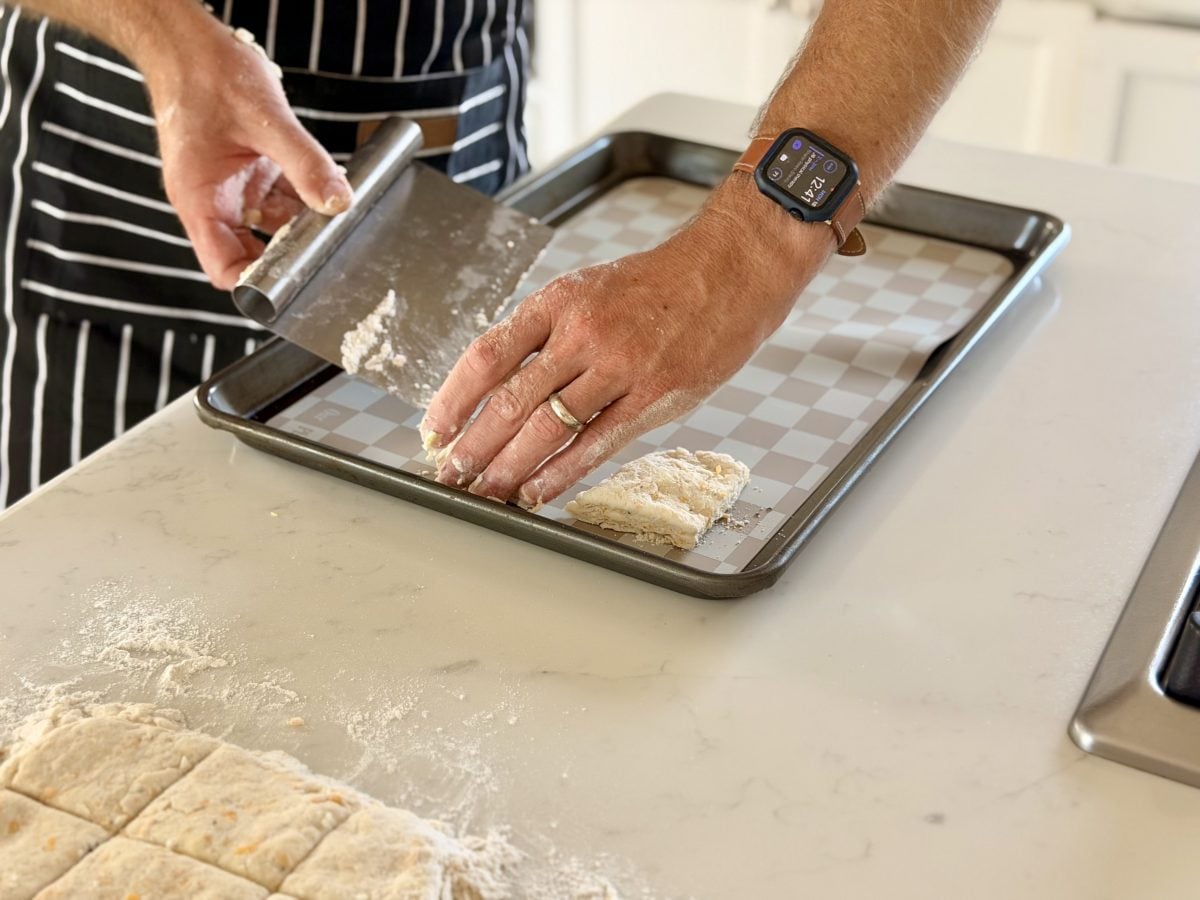
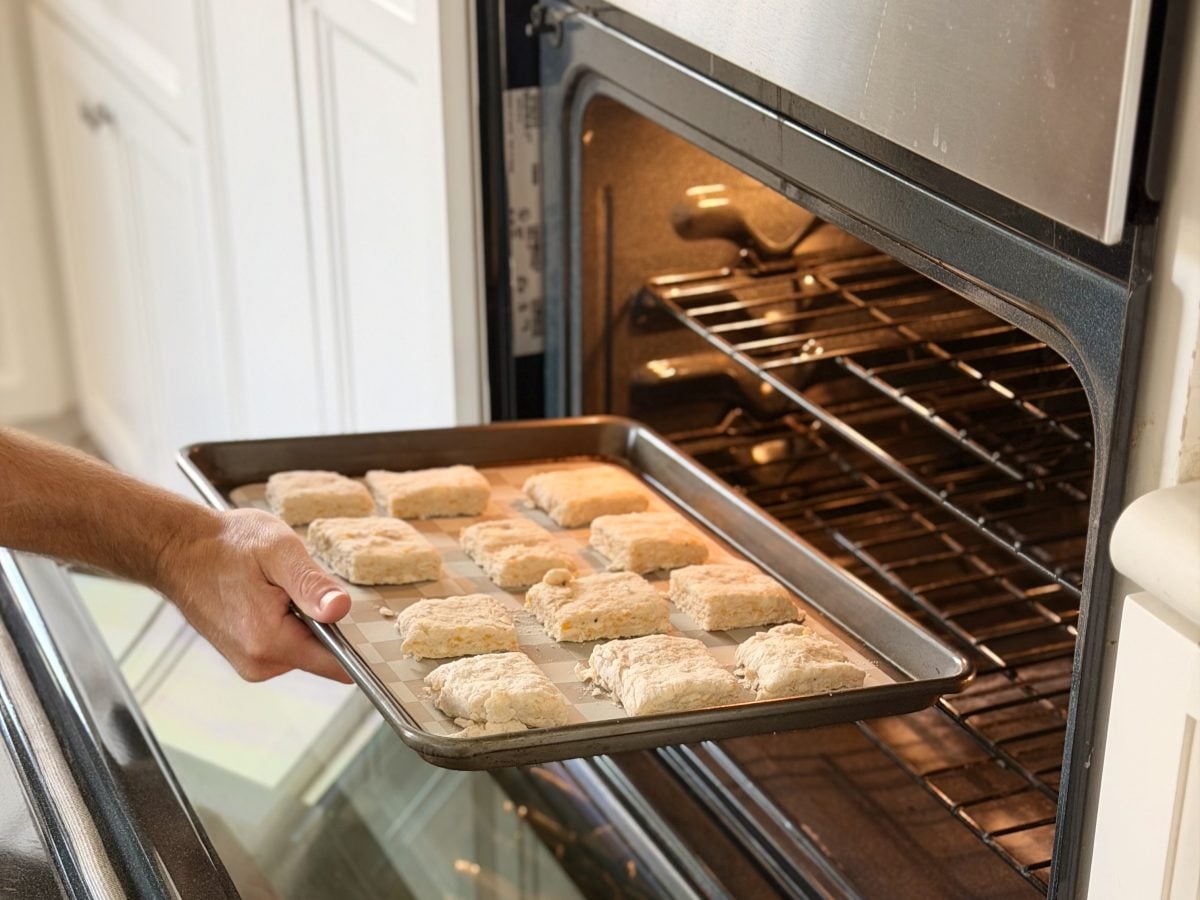
7) Prepare the sheet pan with biscuits. For taller and softer edges on the biscuits, arrange them so that they are touching. For a more distinct edge effect, space your cuts about 1 inch apart.
8) Bake the biscuits for 12-16 minutes or until the tops of the biscuits are tall and baked nicely golden brown. If your oven tends to run cooler than the oven used for the time given, then increase the time by one minute. If the bottoms of the biscuits are browning too quickly, then next time move the pan up a rack.
9) You may want to finish them off with some melted butter. As soon as they come out of the oven, you can brush then with a bit of melted butter. Give it about five minutes so you don’t burn your mouth doing the move we like to call the ‘split and peek at the crumbs’.
Ways to Riff on Sky-High Buttermilk Biscuits
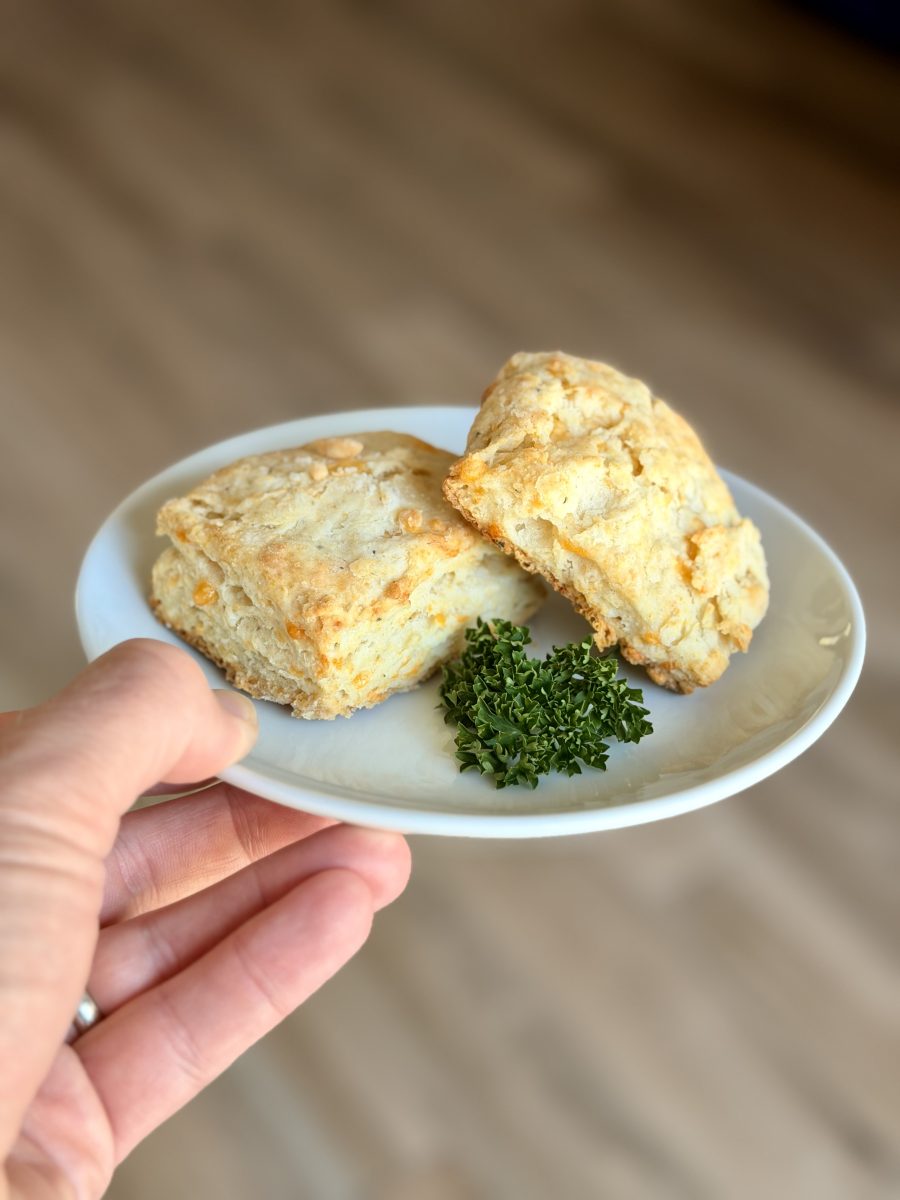
- Cheddar-chive biscuits: Combine the dry ingredients with 2 tablespoons of chopped chives and 3/4 of a cup of grated cheddar cheese.
- Black pepper biscuits: Add 1/2 to 1 tsp of coarsely ground black pepper and pair with the sausage gravy.
- Honey-butter biscuits: Combine 1 tbsp of honey with the buttermilk and use it to brush the honey butter onto the warm biscuits before serving.
- Whole wheat-ish: Substitute 1/2 cup (65 g) flour for whole wheat; if needed, add 1-2 tbsp more buttermilk.
- Drop biscuits (no rolling): Add an extra 2 to 4 tablespoons of buttermilk into the dough to make it a little wetter, then scoop mounds onto the pan and bake according to the directions.
What to Serve With It
- Breakfast: Cut the hotdog in half and fill it with a fried egg, some sharp cheddar cheese, and a piece of salty ham.
- Classic comfort: Both options (sausage gravy or mushroom gravy) deserve a biscuit.
- Sweet: I like adding a little flaky salt on top of my strawberry jam, blackberry preserves, or honey.
- With soup: Tomato, chicken noodle, white bean and kale, or any other soup you want to soak with a sponge.
- With fried chicken: Make a sandwich; accept the compliments.
- Strawberries and cream: Use as the base for shortcake (yes, biscuits; it’s the good kind of controversial)}.
Trouble Spots and Tips
- Biscuits didn’t rise much: Maybe your baking powder is old, your oven isn’t as hot as it says, or you twisted the cutter. Also, too much kneading can sabotage the lift.
- Tough/chewy biscuits: Dough gets too sticky from too much stirring, or the flour dusted onto the counter got a little out of hand with the snow drift method. Next time, try stirring a little less and go with a lighter dusting of flour.
- Dry, crumbly dough that won’t come together: If the flour is spilling over or your kitchen is very dry, buttermilk should be added 1 tbsp at a time until a shaggy dough starts to form.
- Greasy bottoms: The butter may have gotten too warm before baking or the oven wasn’t hot enough. Chill the cut biscuits for 10 minutes before baking. Make sure the oven is set to 450°F / 232°C.
- Flat biscuits: You pressed down too hard when flattening the dough. Try to keep it around 3/4 to 1 inch thick.
- Uneven layers: If you didn’t fold or you blended the butter too much, it should have been left so there are visible pieces of butter, think “rough pebbles”, not “sand”.
- Pro move: You can bake the biscuits in a cast-iron skillet for plush sides, then take them out to look like a biscuit bouquet!
Storage and Leftovers
Since biscuits are made mainly from butter and flour, the biscuit’s nutritional value should not be surprising. The recipe is not going to be trying to replicate something like a rice cake that is airy and light. If you want to add something lighter to your meal, you can combine this with a lean broth chicken soup or with some slaw that is crunchy and has a tangy flavor. Please note that biscuits are not included in the half portion.
Storage: While still warm, enjoy the biscuits at their best! Biscuits are best eaten within the first two days but can be stored in an airtight container at room temperature. To enjoy again, they can be reheated in a 350°F / 177°C oven for 6 to 8 minutes (or split and toasted). If you want to keep them longer, you can freeze them for 2 months. To reheat after freezing, preheat the oven to 350°F / 177°C and heat them for 12 to 15 minutes. You can freeze unbaked, cut biscuits, too. Just place them in a bag after lying flat on a tray. If you are using frozen biscuits, bake them for an extra 2-4 minutes.
Real Runs of This Recipe
First Trip: One Saturday as I was making these, I was also watching a game. Not the best ‘keep eyes on the butter’ scenario. To try and put my warm hands on the dough, I froze the cut biscuits for 10 minutes before baking. The difference was clear: more height, more distinct tiers and that satisfying crack that steams gives an ovation worthy nose hit.
That batch used a makeshift buttermilk, just the last inch of the carton topped off with milk, the way a friend once suggested. Other biscuits were more generous but were also more bland. The next time we used real buttermilk and added a touch more salt. Then, as if out of the blue, the biscuits came to life. Same butter, same biscuits, completely different attitude.
The Prep Checklist
- Preheat oven to 450°F / 232°C; line a sheet pan.
- Keep butter and buttermilk cold (freeze butter 10 minutes if needed).
- Combine the dry ingredients (flour, leaveners, salt, sugar if you want).
- Cut in butter to pea-size pieces + flat shards.
- Mix in the buttermilk until the mixture becomes shaggy and add 1 to 2 tablespoons more only if the mixture seems really dry.
- Do 2-3 gentle folds to create layers.
- Pat to 3/4-1 inch; cut straight down, no twisting.
- Bake 12-16 minutes until deeply golden; brush with butter if you want.
Cook’s Vocabulary
- Cutting in: Cold butter is mixed with the flour. Keeping the butter in small chunks creates flakes and steam.
- Shaggy dough: Dough that may appear a little rough and messy but holds together when pressed is perfect for tenderness.
- Folding (lamination-lite): The dough is layered to create a simply folded and encourage flakiness.
- Leavening: Baking powder and baking soda produce gas which causes the dough to rise.
- Overworking: Mixing or handling the dough too much can cause the development of gluten and make the biscuits tough.
- Close-set baking: Put biscuits with their sides touching so they get taller and have softer sides.
Common Questions
Does it work to make buttermilk biscuits without buttermilk? Yes. You could also mix 3/4 cup of milk with either 2 1/4 teaspoons of lemon juice or 2 1/4 teaspoons of white vinegar and let it sit for about 5 to 10 minutes. The biscuits may not have the rich flavor of true buttermilk biscuits, but they will still be fluffy and taste good.
What is the issue with twisting my biscuit cutter? If a cutter is twisted, biscuits will get firm edges and sealing hitch won’t allow the layers to rise. Therefore, an up-and-down motion is best so the edges stay open to allow the biscuits to rise.
Should biscuits touch when baking? If you like your biscuits to be soft and tall on the sides, touching is better. For increased crunchiness on all sides, leave more space between them. There really are no ‘better’ options, it’s all about your preference.
What if I want to make the dough ahead of time? You can prep the biscuits a day in advance. Just wrap the biscuit dough completely and stick them in the fridge. When you’re ready to bake, just put them in the oven cold and they’ll bake just fine. You can also freeze the unbaked biscuits. And just like the fridge option, toss them in the oven straight from the freezer. Just be sure to add a few extra minutes to the bake time.
What is the best way to reheat biscuits? The best way is to use the oven. First, set the oven temperature to 350°F, and then heat the biscuits for 6-8 minutes (for frozen biscuits heat for 12-15 minutes). Biscuits that are toasted and split have a crunchy outside and a soft inside.
Why did my biscuits brown too fast on the bottom? Dark colored baking sheets, low oven racks, and high oven temperatures can all create rapid browning of biscuits. If your oven has a self heating feature, try using a double sheet pan. When baking, keep a light colored pan on the center oven rack.
Parting Notes
The focus of buttermilk biscuits is not on perfection. This means you get to enjoy the dish even more when something is hot and buttered. When you are trusting the shaggy dough, try not to add more flour and let your hands along with the butter be cold. What does it mean if one of the batches is a little bit uneven? Just split it. The jam won’t care.