The first person at every bridal shower to approach the dessert table stands there, takes a moment, looks up, and exclaims, “Who made this?” Everyone takes a picture and responds, “It’s just some candy and fruit, arranged on three levels.” Everyone takes a picture of the dessert table. This is the part of the event that no one properly estimates, runs out of time to do, and buys a sheet cake from the store. This list is avoiding that.
These items are not showpieces by themselves. They will create the illusion that you hired a stylist. Over the years I’ve gained valuable insights, including the popularity of miniature desserts (12 dollop desserts are more generous than 3 large cakes), and the unparalleled decorative utility of berries (a $14 box of raspberries can really make a dessert table look expensive).
Contents
- 1) Mini Cupcakes
- 2) Strawberry Shortcake Cups
- 3) Lemon Bars
- 4) Chocolate Dipped Strawberries
- 5) Raspberry Macarons
- 6) Mini Cheesecake Bites
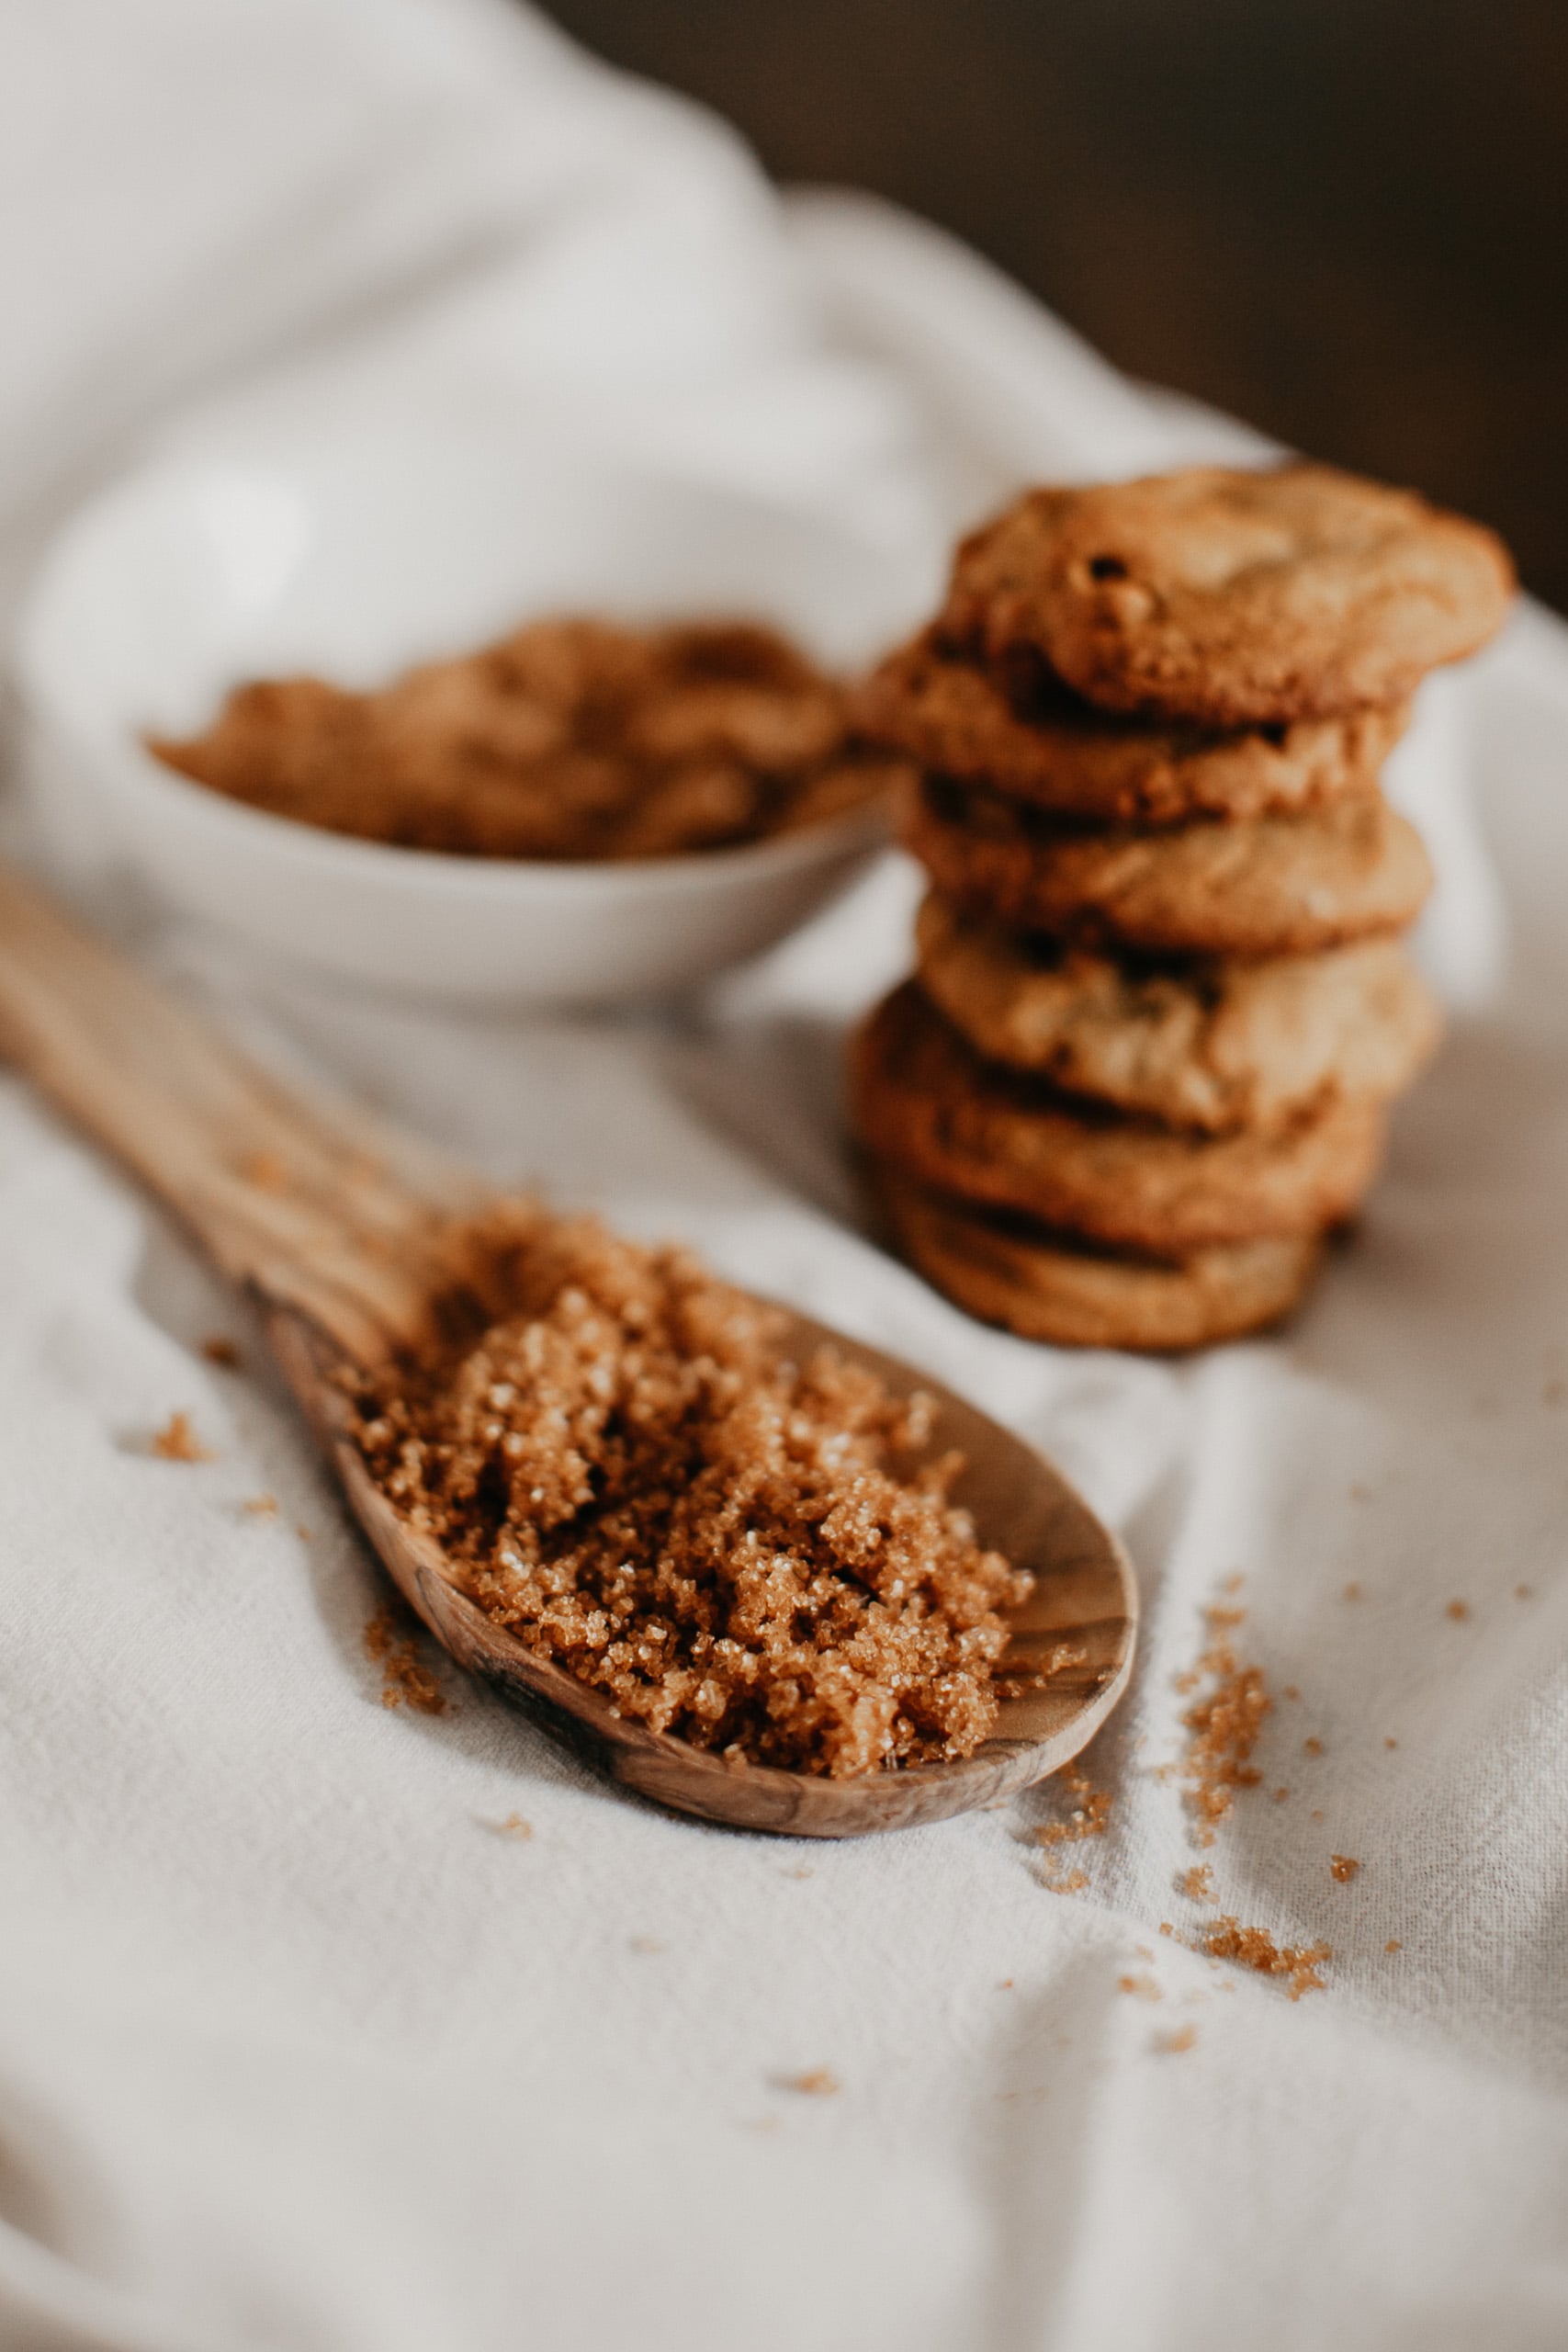
- 7) Shortbread Cookies
- 8) Cookie Sandwiches
- 9) Mini Pavlovas
- 10) Strawberry Champagne Cupcakes
- 11) Coconut Cream Tartlets
- 12) Almond Financiers
- 13) Chocolate Truffles
- 14) Mini Eclairs
- 15) Strawberry Layer Cake Slices
- 16) Mini Banana Pudding Parfaits
- 17) Raspberry Blondie Squares
- 18) Chocolate Mousse Cups
- 19) Berry Galette Slices
- 20) Tea Cookies
- 21) Mini Carrot Cake Cupcakes
- 22) Hand Pies
- 23) Chocolate Cookie Pops
- 24) Mini Cream Puffs
- 25) Panna Cotta Cups
- 26) Mini Brownie Bites
- 27) Strawberry Meringue Kisses
- 28) Mini Tiramisu Cups
- 29) White Chocolate Bark
- 30) Mini Scones
- 31) Mini Fruit Tartlets
1) Mini Cupcakes
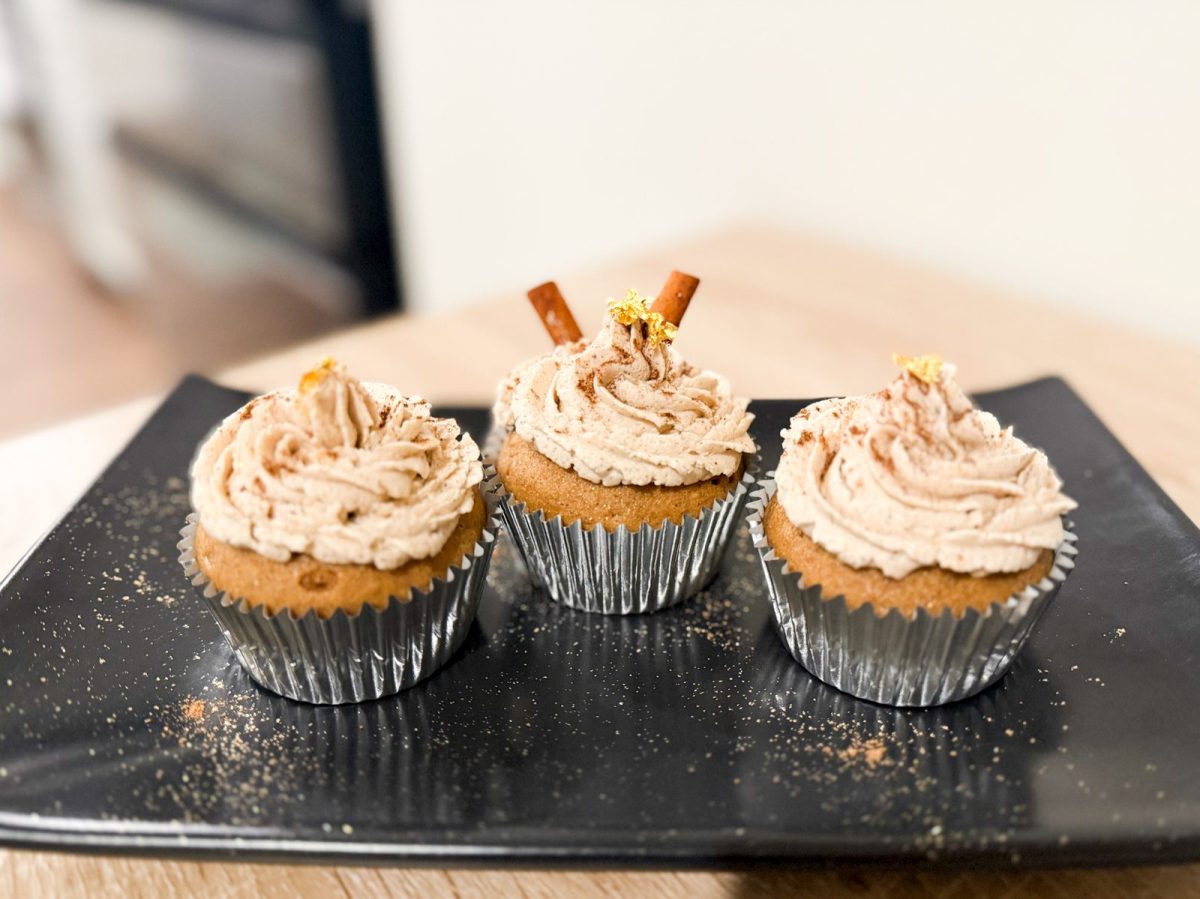
The pitch for Mini Cupcakes: A dessert table isn’t complete without a cupcake display. No cutlery required, available in two colors and two flavors.
To prepare the cupcakes, you can either use a box mix or make the batter from scratch (we won’t judge). Preheat the oven to 350°F and fill each of the 24 cups in a mini muffin pan with batter. Bake for 11-13 minutes. You’re looking for a toothpick to come out with a few moist crumbs – that will be your cue to take them out. Be patient on the frosting, you should only apply it once the cupcakes have completely cooled down.
Pipe two flavors of vanilla and strawberry (or pink and white) Swiss meringue buttercream (or any frosting of your preference) onto each cupcake. You will want to take fresh raspberries to top of half of the cupcakes and for the bottom half dusted with pink sanding sugar.
These can be stored in a sealed container for 2 days so make the cupcakes the morning of the shower. A box mix that contains large egg whites (as opposed to whole eggs) will result in a more tender and delicate cupcake crumb that will taste more homemade. Though it requires a little more effort, the better texture will be worth the extra time.
2) Strawberry Shortcake Cups
Why Strawberry Shortcake Cups pull their weight: Layered desserts in small glass jars. The easiest visual win on a bridal table is this example which features cake striping in cream and strawberry.
To prepare the strawberries, do the following: wash, hull and slice the berries, combine with 3 tablespoons sugar and 1 teaspoon lemon juice. Allow the mixture to sit for 30 minutes to allow the juices released to transform into a syrup. Next, whip 2 cups of heavy cream with ¼ cup of powdered sugar and 1 teaspoon vanilla until soft peaks form. Then, prepare a store bought pound or angel food cake by cutting it into ½ inch cubes.
In 12 small mason jars or stemless wine glasses create two layers starting with a cake layer followed by strawberries (with juices) and then the whipped cream. These desserts can be stored in the refrigerators for 4 hours but if they sit in there longer the cake will become soggy. Just before serving, add a whole berry on top.
Swap: Instead of mason jars, immortal trifles can be created in martini glasses. When placed on a tall riser, they become more elegant, dramatic and less formal.
3) Lemon Bars
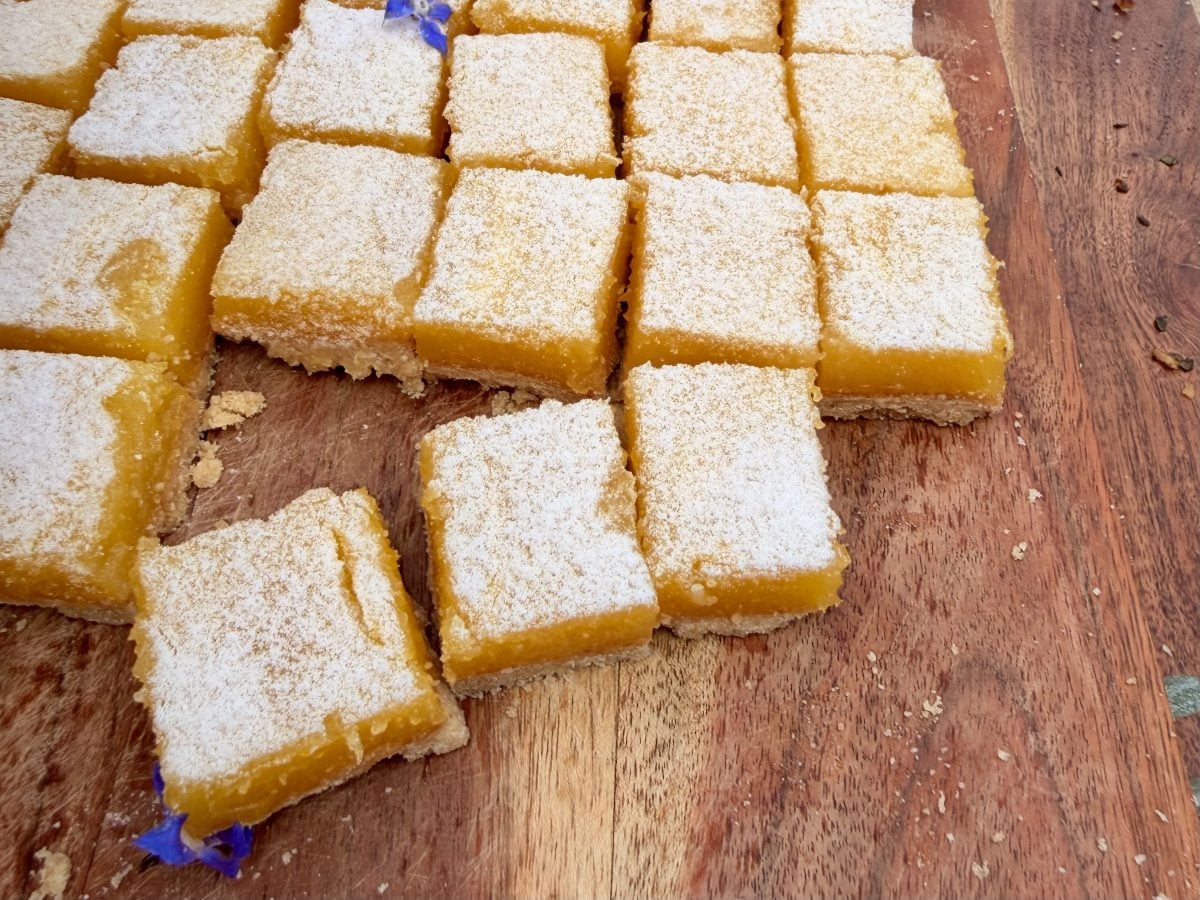
What Lemon Bars get you: A pan of lemon bars cut. As the table gets covered in bright yellow squares with white powdered sugar, I have locked in my color story.
To make the shortbread crust, mix 2 cups flour, 1 cup softened butter, ½ cup powdered sugar, and a dash of salt. Pack the mixture into a 9×13 pan and bake for 18-20 minutes at 350°F until just barely brown. In a separate bowl, whisk together 6 eggs, 2 ½ cups sugar, and 2/3 cup lemon juice. Pour the mixture onto the crust while it’s still warm, then bake for another 22 to 25 minutes.
The filling should be set but still have a nice wiggle in the center. Freeze for 2 hours, then cut them into 32 mini bars and dust with powdered sugar. You can even store them in an airtight container for 3 days in the fridge.
Add 1 tablespoon of finely grated ginger to the lemon mixture. It provides a warming sensation and enhances the lemon flavor.
4) Chocolate Dipped Strawberries
Why it’s table worthy: The chocolate dipped strawberries served on white trays and presented as such look very classy and are inexpensive. Plus, after 20 minutes of 3-ingredient work, you get great results!
Starting with the strawberries, you need to wash and dry all 24 of the large strawberries. Note: To make sure water doesn’t cause the chocolate to seize, be sure to dry your strawberries with a paper towel. Next, if you are using a microwave to melt chocolate, use 8 oz of good white chocolate, and if you are using a double boiler, melt it in a double boiler.
Grab each berry by the stem, and dip 2/3 of it into the chocolate. Let the extra chocolate drip off and then place the berry on a parchment paper lined sheet pan. For the final step, refrigerate for 15 minutes to allow the chocolate to set. You may store it in the refrigerator for 8 hours (if you keep it any longer, the berries will weep). Allow the chocolate to rest for 20 minutes so that it doesn’t become too brittle.
Swap: These instructions still hold for all of the milk and dark chocolate variations, even if they are less bridal-palette friendly.
5) Raspberry Macarons
Why Raspberry Macarons make the cut: Making macarons is expensive, and Raspberry Macarons are relatively cheap to make, at just $14 per batch. The pink color and ruffled design is also very appealing.
To make the shells: sift 1¾ cups of powdered sugar and 1 cup of almond flour (the more times you sift, the less bumpy the shells will be). Whisk egg whites with ¼ cup of sugar and some cream of tartar until stiff, glossy peaks form.
Fold in some pink gel food coloring. Separate the mixture into three bowls and fold in the dry ingredients. To get a proper lava-like consistency, the batter should fall from the spatula in ribbons that take 10 seconds to disappear. Pipe 1.5 inch circles onto parchment paper. Let them dry for 30-45 minutes to form a skin. Bake for 14-16 minutes at 300°F. The cookies should have feet that don’t stick to the parchment and remain still when you touch them. They will be good in the fridge for up to 5 days. For the filling stir together vanilla buttercream and raspberry jam.
To save time, use pre-made macaron shells from Trader Joe’s or Costco (they have them seasonally) and make the filling fresh. This saves about 90 minutes and although it is a bit more expensive no one will notice at the shower.
6) Mini Cheesecake Bites
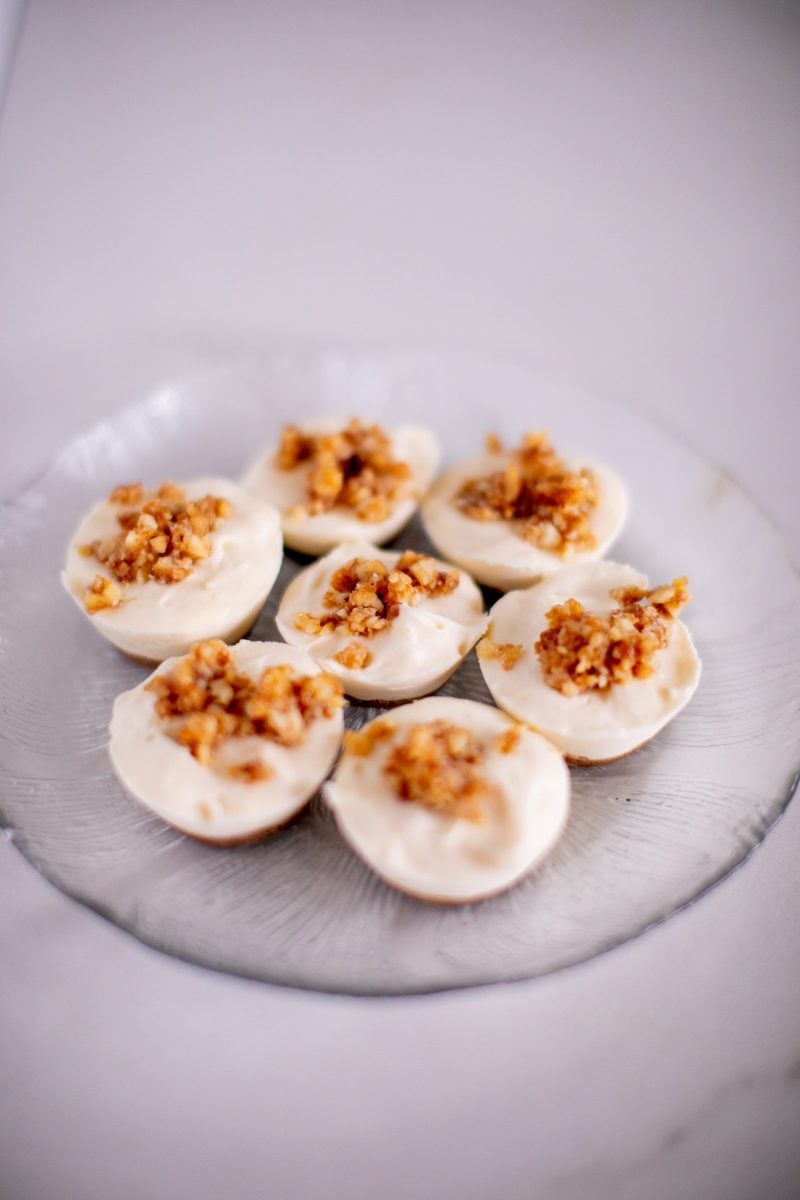
Mini Cheesecake Bites can be produced using a mini muffin pan which gives them an authentic look and makes them a lot easier to serve as opposed to an awkward slice of cheesecake.
To make the base, mix together 1 cup of graham cracker crumbs and 3 tablespoons of melted butter, then press the mixture evenly into the base of 24 lined mini muffin cups. In a separate bowl, mix together 16 oz of softened cream cheese, ⅔ cup of sugar, 1 egg, 1 tsp of vanilla, and 1 tbsp of lemon juice until smooth (taking care not to overmix, as this will cause the cheesecake to crack). Fill the muffin cups to about ⅔ of the way full and bake for 16 to 18 minutes at 320°F.
Once baked, there should be a slight wobble in the center. Leave the cheesecake bites to cool completely before placing them in the fridge to set for at least 4 hours. Once set, you can top them with a small amount of raspberry preserves, or a fresh raspberry. These can be stored in the fridge for up to 4 days.
For a swap you can use Biscoff cookies or shortbread cookies instead of graham crackers. This results in a more complex and spiced flavor profile. The method is still the same.
7) Shortbread Cookies

Why shortbread cookies deserve a spot: Many shortbread cookies will take a celebrated spot on a wedding dessert table and will not be appreciated or even noticed for being there. The way you sliced them, shows your style.
To make the dough cream 1 cup of softened butter with 1/2 of a cup of confectioners sugar and 1 teaspoon of vanilla until the mixture is fluffy. Then add in 2 cups and a pinch of salt and mix until combined. Then dust your work surface with flour and roll the dough out to a thickness of 1/4 inch.
After that, with small cookie cutters 1 1/2 inches of hearts, flowers and circles, cut out the cookies. Put them on a parchment lined baking sheet and take a fork and poke each cookie on the top, and bake them for 12-15 min at 320°F. The shortbread cookies are done when the edges are light golden brown and the top is still pale. Afterwards, either dust some sanding sugar on top of the cookie or dip half of the cookie in melted white chocolate.
When you replace the rosemary and lemon zest, it gives the shortbread a more floral and savory touch.
8) Cookie Sandwiches
The filling and cookies of sandwich cookies combine to create some drama together.
To make these, you need a batch of sugar cookies which is made by either a sugar cookie recipe or store-bought cookie dough to make the process quicker. Once the dough is prepared and cooled, make mini 1.5 inch wide cookies and bake 48 of them. Cookie pairs can have the following fillings: buttercream (flavored or regular), lemon curd, some jam or even salted caramel. Use a gentle sandwiching motion to push the cookies together so they don’t ooze out of the sides.
To get a nice finished look, roll the cream edge in some sprinkles, freeze-dried strawberries (crushed), or sugar (sanding). These treats can be stored in an airtight container at room temperature for up to three days. Make sure to eat them early on before the filling softens the cookies too much.
You can simplify this recipe by using chocolate sandwich cookies instead of making your own. Examples of this include Oreos that have been disassembled and restuffed with a different buttercream.
9) Mini Pavlovas
Why are Mini Pavlovas here? A pavlova base looks like a cloud and has the texture of meringue with fruit and whipped cream. The little ones seem to be made of some kind of jewelry.
Whisk 4 egg whites with a little bit of cream of tartar until soft peaks form. Then, while continuously beating, add 1 cup of caster sugar (or granulated sugar that has been processed to a fine consistency) one tablespoon at a time until stiff and glossy peaks form. Mix 1 tsp of cornstarch with 1 tsp of white vinegar (the two elements that create a pavlova’s crispy shell). Use the back of a spoon to create a small dip in each mound and pipe or spoon 16 small mounds onto sheet trays lined with baking paper.
Bake for an hour and 15 minutes at 250 degrees Fahrenheit. You should have shells that are dry and crispy on the outside and soft on the inside. Leave to cool completely in the oven. The bare shells can be kept for a maximum of 3 days. If the pavlovas are in ideal condition, the service time should take no more than 30 minutes. They will be crowned with whipped cream and a scattering of fresh berries.
Swap suggestion: Instead of baking 16 tiny pavlovas, you might like to bake 1 large pavlova instead. That would make a more stunning centerpiece, but it would be less easy to transport and more tricky to serve in a neat way.
10) Strawberry Champagne Cupcakes
Strawberry Champagne Cupcakes: the batter has champagne in it, and the icing is a not-so-subtle bridal cupcake reference.
To prepare the batter for the vanilla cupcakes, you will substitute ½ cup of milk in the recipe for champagne or prosecco (open the bottle about 30 minutes beforehand to let the bubbles settle). Bake in a mini muffin pan (24 cups) at 350 degrees Fahrenheit for 11 to 13 minutes.
Test with a toothpick; it should come out with a few moist crumbs. Allow to cool completely. To prepare champagne buttercream, combine 1 cup of softened butter and 3 cups of powdered sugar and 4 tablespoons of champagne in a mixing bowl and mix (add champagne in no more than 4 tablespoons, otherwise the frosting will split).
Use pink gel coloring to pipe on the frosting on the cooled cupcakes. Place one sugar pearl or a thin piece of edible gold leaf on top of each one. For 24 hours, store in a sealed container at room temperature. Instead of the batter and frosting, you could use a non-alcoholic sparkling rosé or apple cider. It provides similar bubbles, and the flavor will be more fruity instead of the yeasty-grape taste.
 Nathaniel’s Pantry Notes: Berry Season Is the Cheap Decoration
- Mixed berries are more valuable than matched. Three colors of berries (raspberry red, blueberry blue-purple, blackberry black) on one tier is the best look for the lowest price.
- Pile them in clusters. Scattered single berries look like leftover party food, but small clusters of 5 to 7 berries look styled.
- Buy them the day you need them. Pints of raspberries go bad very quickly, and brand new ones bought right before you need them will look picture-worthy.
- Uncut strawberries are ideal. The green leaves on the stem are free decoration. Trim them off and the strawberry looks naked.
11) Coconut Cream Tartlets
Why Coconut Cream Tartlets are a Good Idea: Mini pre-baked pastry shells and a coconut cream filling create a delightful and light tropical experience. They really showcase an elegant dessert option.
To begin, preheat the oven to 375°F. Get your tart shells ready. If you have homemade tart shells then use those, otherwise use store bought. Place 24 tart shells into the oven and bake for 8-10 minutes. They should be a light golden brown. Once done, set them aside to cool. Next, to make the coconut cream, take a medium pan and pour in the solidified thick cream from 1 can of coconut cream. Additionally, add 2 egg yolks, 3 tablespoons of white sugar, 2 tablespoons of corn starch, and 1 teaspoon of vanilla.
Whisk this mixture and place it on the stove on medium heat, cooking for about 4-5 minutes. When done, incorporate half a cup of whipped cream. Now fill the cooled tart shells and top with a toasted coconut curl or a single fresh raspberry. Keep the tarts in the refrigerator for no more than 24 hours.
If you would rather invoke a more typical French pastry flavor you can opt to substitute the coconut for vanilla pastry cream. While this is less intriguing, it is also equally stylish.
12) Almond Financiers
What you get with Almond Financiers: Small almond cakes that are very buttery and nutty which are an excellent contrast to the fruit based desserts.
To make brown butter, in a saucepan, put ¾ cup of butter over medium heat. After 4-5 minutes, the butter should smell like toasted hazelnuts and should have a deep amber color. Remove from heat and let cool. In a separate large bowl, combine 1 cup of almond flour, 2/3 cup of powdered sugar, and 1/4 cup of all-purpose flour. Then, add the cooled brown butter and mix. Use a piping bag or a spoon to fill 24 mini muffin tins that have been greased with the batter.
Bake for 12 to 14 minutes at 400 degrees Fahrenheit. You want the edges and centers to be very golden, and springy when you press down (they should spring back). Let them cool completely before dusting with powdered sugar. Brown butter mini muffins can be stored in an airtight container at room temperature for 3 days.
Swap: Before baking, add one raspberry or one slice of pear to each financier. This provides a built-in visual highlight, as well as a sweet-tart contrast.
13) Chocolate Truffles
What makes Chocolate Truffles special: A square plate with twelve hand-rolled chocolate truffles could easily be priced at $30. We sell them for $4.
Place the heavy cream in a saucepan and wait until it begins bubbling. Pour the cream over more than 12 ounces of chopped quality chocolate (either semisweet or bittersweet) in a bowl that can withstand heat. After 2 minutes, stir it gently and stop as soon as it becomes smooth, as you are making ganache. Add an additional tablespoon of butter, one tablespoon of vanilla, or one of your favorite liqueurs (either Grand Marnier, Frangelico, or Chambord).
Allow for the mixture to cool for 2-3 hours until it has set enough to scoop. Use a melon baller or a teaspoon to make 24 small balls, then roll them in cocoa powder, powdered sugar, or chopped nuts and keep them in the fridge for 1 week. 15 minutes before you serve them, set the balls out at room temperature.
Variation: For this batch, I used rolled freeze-dried strawberries instead of cocoa to create an interesting look and flavor. The freeze-dried strawberry coating provided a nice contrast to the chocolate and made for beautiful photos.
14) Mini Eclairs
The case for Mini Eclairs: Mini eclairs give the impression that they’ve come straight from a proper patisserie. While choux pastry might seem a little daunting, you will find it is actually a very forgiving technique after a couple of tries.
Begin by assembling the following ingredients: 1 cup of water, ½ cup of butter, 1 tbsp of sugar, and a small amount of salt. Place all 4 ingredients into a saucepan and bring it to a boil. Once at a boil, take the saucepan off the burner. You will then add 1 cup of flour and mix the batter until it forms a ball. Next, reduce the heat and allow the batter to cook uncovered for 2 minutes to allow some of the moisture to evaporate. After allow the batter to cool for five minutes, you will add 1 egg.
Repeat this until you’ve added the appropriate number of eggs according to the recipe. Pipe this batter into 3 inch lengths on a baking sheet lined with parchment paper. Bake at 425°F for 15 minutes. Before the timer goes off, adjust the oven temp to 350°F. When the 15 minutes is complete, lower the oven temp to 350°F and allow them to bake for another 15 to 18 minutes.
To tell if they are finished, the puffs should be a deep golden brown and sound hollow when tapped. Once finished, split each puff and fill it with either vanilla pastry cream or whipped cream, and drizzle with chocolate glaze. The eclairs can be kept in the fridge after they have been filled for 4 hours.
It will be a 90 minute time saver to make the filling and purchase mini choux puffs. No one will know it was a shortcut. It will cost just $8.
15) Strawberry Layer Cake Slices
Reason for appearing in the table: A centerpiece-shaped stress free cake is a strawberry layer cake, refined and arranged as a tiered stand.
A vanilla cake can be made from a cake mix of your choice, but no one is judging if you make a strawberry cake from a cake mix. Bake at 350°F for 25-28 minutes. You can use two 8-inch round cake pans. Cool completely. Ingredients: 2 cups softened butter, 6 cups powdered sugar, 4 tablespoons cream, and some vanilla and salt.
First, let the butter soften. The next step is to cream the butter. Then mix in powdered sugar along with the cream, vanilla and a dash of salt. Finally, combine all of that to make the buttercream frosting. Then, take each layer of the cake and cut it in half horizontally so that now you have 4 layers. Each layer is creamed with buttercream frosting and layered with fresh strawberries.
Then apply a rustic frosting around the edge of the cake. A sparse naked cake look helps to hide imperfections and will look more rustic and intentional. Then for cake decoration, add a sprig of mint, edible flowers or whole strawberries. Finally, refrigerate the cake and cut it into 16 small wedges right before serving.
You can replace the buttercream frosting with cream cheese frosting if you want. It is tangier so instead of too sweet you will be better off in warmer rooms.
16) Mini Banana Pudding Parfaits
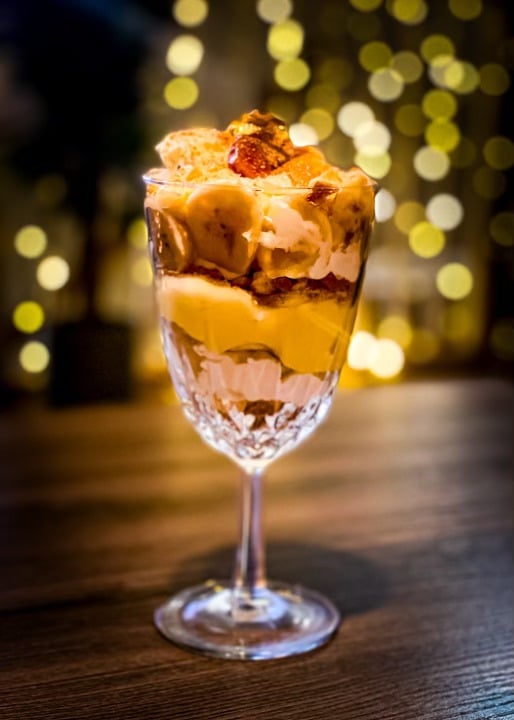
The combination of banana pudding layers paired with fruity and pink frosting makes for a warm, comforting, and delightful dessert. Pudding can also be served in single portions by layering in small cups or jars. Individual Mini Banana Pudding Parfaits are easy to create and are a perfect serving size.
In a large saucepan, combine 1 cup of sugar, ⅓ cup of cornstarch, a dash of salt, and 4 cups of whole milk. Whisk together and stir consistently over medium heat for 8-10 minutes until the mixture thickens to a pudding-like consistency. After thickening, take off of the heat and stir in 4 yolks (be sure to heat temper some of your pudding with the yolks first), 2 tablespoons of butter, and 2 teaspoons of vanilla. Allow mixture to cool to room temperature before finishing.
At this point, Whip your cream (1 ½ cups) to a soft peak, then fold in half to the pudding mixture. Finally, layer pudding , crushed vanilla wafers, and banana slices until your 12 small glasses/ cups are full. Finish by topping with whipped cream and a vanilla wafer. Allow to set in your fridge for 4 hours.
For the pudding, feel free to use store bought vanilla pudding (be sure it’s the cooked kind, not instant). This would save you about 12 minutes and would be a slightly less rich, which, for a shower, is perfectly acceptable!
17) Raspberry Blondie Squares
What works for the Raspberry Blondie Squares: Brownies that are dense and chewy will complement the creamier and fruitier components of the dessert. The addition of raspberries is also nice for the color story.
To begin, melt 1 cup of butter in a saucepan over low heat. After it has melted, take the saucepan off the heat and stir for a few moments until the butter and 2 cups of brown sugar has completely combined. In a separate bowl, combine and beat 2 eggs with 2 teaspoons of vanilla. In that same bowl, add 2 cups of flour, 1 teaspoon of baking powder, and ½ teaspoon of salt, and stir once to combine.
Finally, gently fold in 1½ cups of fresh raspberries and ½ cup of white chocolate chips being careful not to break the raspberries. Pour the batter evenly into a 9×13 pan that has been lined with parchment paper. Bake for 28 to 32 minutes at 350°F. The top of the mixture should be a deep golden brown and the center should be slightly wobbly. After it has cooled fully, cut the mixture into 32 equal pieces. For up to 4 days, keep the mixture in an airtight container at room temperature.
Fresh raspberries can be substituted for frozen ones. However, do not thaw the frozen ones prior to adding them, as they will bleed into the batter. For those who can see a bit more moisture, bake an extra 4 to 5 minutes.
18) Chocolate Mousse Cups
Why Chocolate Mousse Cups belong here: Chocolate mousse served in miniature glasses or espresso cups is an elegant individual portion chocolate dessert. The gloss and depth of the dessert do all the work.
First, refrigerate some whipped cream until it reaches soft peak stage. Use a double boiler to melt the butter and chocolate together. Once melted, allow the mixture to cool slightly before adding in each of the egg yolks. Vanilla is added to this mixture afterward. In a different bowl, whip the egg whites (these are preferably at room temperature) until soft peaks form. While they are being whipped, add in the 1/4 cup of sugar until the peaks are shiny and firm.
After the whipped cream and chocolate mixture have been combined, you fold in the meringue in two additions so that the mixture does not deflate too much. Using a piping bag or a spoon, distribute the mixture to each of the twelve individual serving glasses. Transfer to the refrigerator to chill for 4 hours at a minimum. Finally, garnish whipped cream, a single raspberry, or chocolate shavings.
Swap: Use a no-cook chocolate mousse made with Cool Whip + melted chocolate + cream cheese. It’s not as airy, simpler, works with almost any type of chocolate, and has the same finished appearance as the mousse.
Nathaniel’s Pantry Notes: The Color Story (Three Colors Maximum)
- Pick your three early. Gold, cream, and blush or sage, pink and white, or ivory, brass, and burgundy. Before baking.
- Brown chocolate is the silent killer. Unless heavily dusted in powdered sugar or piped with pink frosting, some chocolate treats are too dark and go to the back. Others have to be skipped.
- The eye sees a palette, not chaos. All pink things together, all cream things together, and so on.
- White provides visual breathing room. Don’t skimp on white. More white skirting, white plates, white napkins, white frosted cupcakes means less clutter and more style.
- A few berries won’t upset the color palette and will give a fresh look. Use them for styling, not as part of the dessert.
19) Berry Galette Slices
Why this belongs on the table: A berry galette with rustic charm adds character for the table display as dessert and the sliced wedges are an inviting offering.
To make a berry galette, firstly, place a rolled out pie crust (this could either be store-bought or home-made) on a parchment paper sheet that is around 12 inches wide. For the filling, use a mixture of strawberries, blue berries, raspberries and blackberries to fill the center while leaving a 2 inch border. In a bowl, mix 1/3 cup of sugar, 1 tbsp of cornstarch and some lemon juice to taste and then pour that mixture over the berries.
Fold the edge of the crust over the berries to make pleats and once you have an evened out crust then its time to brush some egg wash and sprinkle turbinado sugar all over it. Bake for 35–40 minutes at 390°F. You will know it is done when the crust is golden brown and the berry juice is bubbling. Once it is done, let it cool for half an hour before slicing it into twelve thin wedges.
For a more straightforward approach regarding the idea of color and flavor, use a single fruit (either just peaches or just strawberries). More simple, less rustic; less interesting, more understated.
20) Tea Cookies
Why This Belongs on the Table: A personalized tea platter with mini lemon or rose tea biscuits will bring a floral theme and a soft beige pink color which will help tie the table setting together.
Mix 1 cup of room temperature butter with 2/3 cup of powdered sugar. Add 1 tablespoon of lemon zests and 1 teaspoon of vanilla. In a separate bowl, mix 2 cups of flour and a pinch of salt. Chill dough for 30 minutes. Roll dough into 1 tablespoon sized balls, and place on parchment lined sheet pans. Using the bottom of a glass, flatten each ball so they’re about 1cm thick.
Bake at 320°F for 12-14 minutes, and keep an eye on them until the edges and tops are pale gold and almost white. Let them cool completely before dusting with powdered sugar or drizzling a light lemon glaze (powdered sugar mixed with lemon juice). These cookies can be stored in an airtight container, and will stay fresh for up to 5 days at room temperature.
Substitutes: For more floral flavor, feel free to add 2 tablespoons of dried lavender into the dough or 1 teaspoon of rose water. Use sparingly.
21) Mini Carrot Cake Cupcakes
Pitch for Mini Carrot Cake Cupcakes: Mini carrot cake cupcakes with cream cheese frosting offer a pleasant surprise of warm orange flavor that exceeds expectations.
Combine the dry ingredients in one bowl: 1¼ cups of flour, 1 teaspoon of baking soda, 1 teaspoon of cinnamon, ½ teaspoon of ground nutmeg, and ½ teaspoon of salt. Then, in a different bowl, whisk together the following wet ingredients: eggs (2), oil (⅓ cup), brown sugar (⅓ cup), sour cream (⅓ cup), and vanilla (1 teaspoon). Add 1½ cups of finely grated carrots (definitely essential) and walnuts (⅓ cup, optional).
Fill twenty-four mini muffin tins two-thirds full. Place in an oven preheated to 350 degrees F and bake for 13 to 15 minutes. Cool completely (your cupcakes, NOT the oven). Frost with cream cheese frosting (made from 8 oz. cream cheese, ¼ cup of softened butter, 2 cups of powdered sugar, and some vanilla). For a decoration, place a tiny piece of candied carrot or a small pinch of cinnamon.
A potential swap to try: Use a cake mix and add the spices and carrots to the mix. This will save 8 minutes of prep time. The end product will likely have a more consistent crumb structure and an indistinguishable difference in taste compared to most eaters to the current recipe.
22) Hand Pies
Why are hand pies valuable: If everyone gets their own pie, there are no disputes. There is no need for plates, cutlery or even packaging.
Use a 3-inch cookie cutter to make 24 to 30 circles from the double pie crust you rolled out. For the filling, combine 2 cups of finely diced peaches (or apples), ¼ cup of sugar, 2 tablespoons of cornstarch, a teaspoon of cinnamon, and a squeeze of lemon. Add a tablespoon of filling and place it on one side of the circles, fold over the other halves, and use a fork to crimp the edges.
Cut two small steam vents on top of each. Brush with egg wash and sprinkle a bit of turbinado sugar on top. Bake for about 22 to 25 minutes at 400°F. They should have a golden brown, crackly crust with filling bubbling out. For best results, serve after cooling for 15 minutes. These can be kept for 1 day at room temperature.
Store bought apple pie filling will save you 10 minutes and although it may be a bit sweeter than homemade, it will be just as cute and delicious.
23) Chocolate Cookie Pops
What Chocolate Cookie Pops get you: Cookie pops on sticks look like centerpiece desserts. If you put a dozen in a tall vase, they will become the centerpiece of the table.
Using the chocolate sugar cookie dough or the chocolate shortbread dough, create a batch of cookie dough and roll it out to ¼ of an inch thick. Take a 2 inch cutter and cut out pieces in the shapes of circles or hearts. Insert a lollipop stick into each one and position them on a sheet pan that is covered with parchment paper. They should be baked for 14 to 16 minutes at 325°F (it is advised to do under 16 minutes to prevent any cracking).
Allow the cookies to cool completely. To decorate them, dip one side in some melted white chocolate and drizzle melted dark chocolate on top of the white chocolate. To finish the decorations, use some edible glitter, sanding sugar, and a fondant disk. Use a ribbon and cellophane to wrap the wands. An anchor should be placed in a tall jar filled with pink or white candies. The jar must be sealed with a bag for five days.
You can instead use Oreos or any other store bought sandwich cookies if you would like. Just stick on some sticks and do some decorating to make a centerpiece that not only looks great, but also saves you about an hour and a half of work.
24) Mini Cream Puffs
Unlike eclairs which come with some risks, cream puffs that are filled with vanilla cream and dusted with powdered sugar look as if they come from a very high end pastry shop.
Prepare a basic choux pastry by heating 1 cup of water with 1/2 cup of butter until boiling. Once boiling, remove from heat and stir in 1 cup of flour, a pinch of salt, and a pinch of sugar. Mix until the dough looks smooth and comes away from the edges of the pan. Allow the dough to cool for 5 minutes, then beat in 4 eggs (adding one egg at a time).
Pipe the mixture into 1 inch mounds on a baking sheet lined with parchment paper. Bake for 12 minutes at 425°, then turn the oven down to 350° and bake for another 12-15 minutes. The puffs should be deep golden brown, and sound hollow when tapped. Once cooled, fill with whipped cream or pastry cream and dust with icing sugar. The filled puffs can be stored for 4 hours, and the unfilled puffs will last 2 days in a sealed container.
Costco’s mini cream puffs can be used to save time and effort. Improve the look of the dessert by adding a fresh berry on top.
25) Panna Cotta Cups
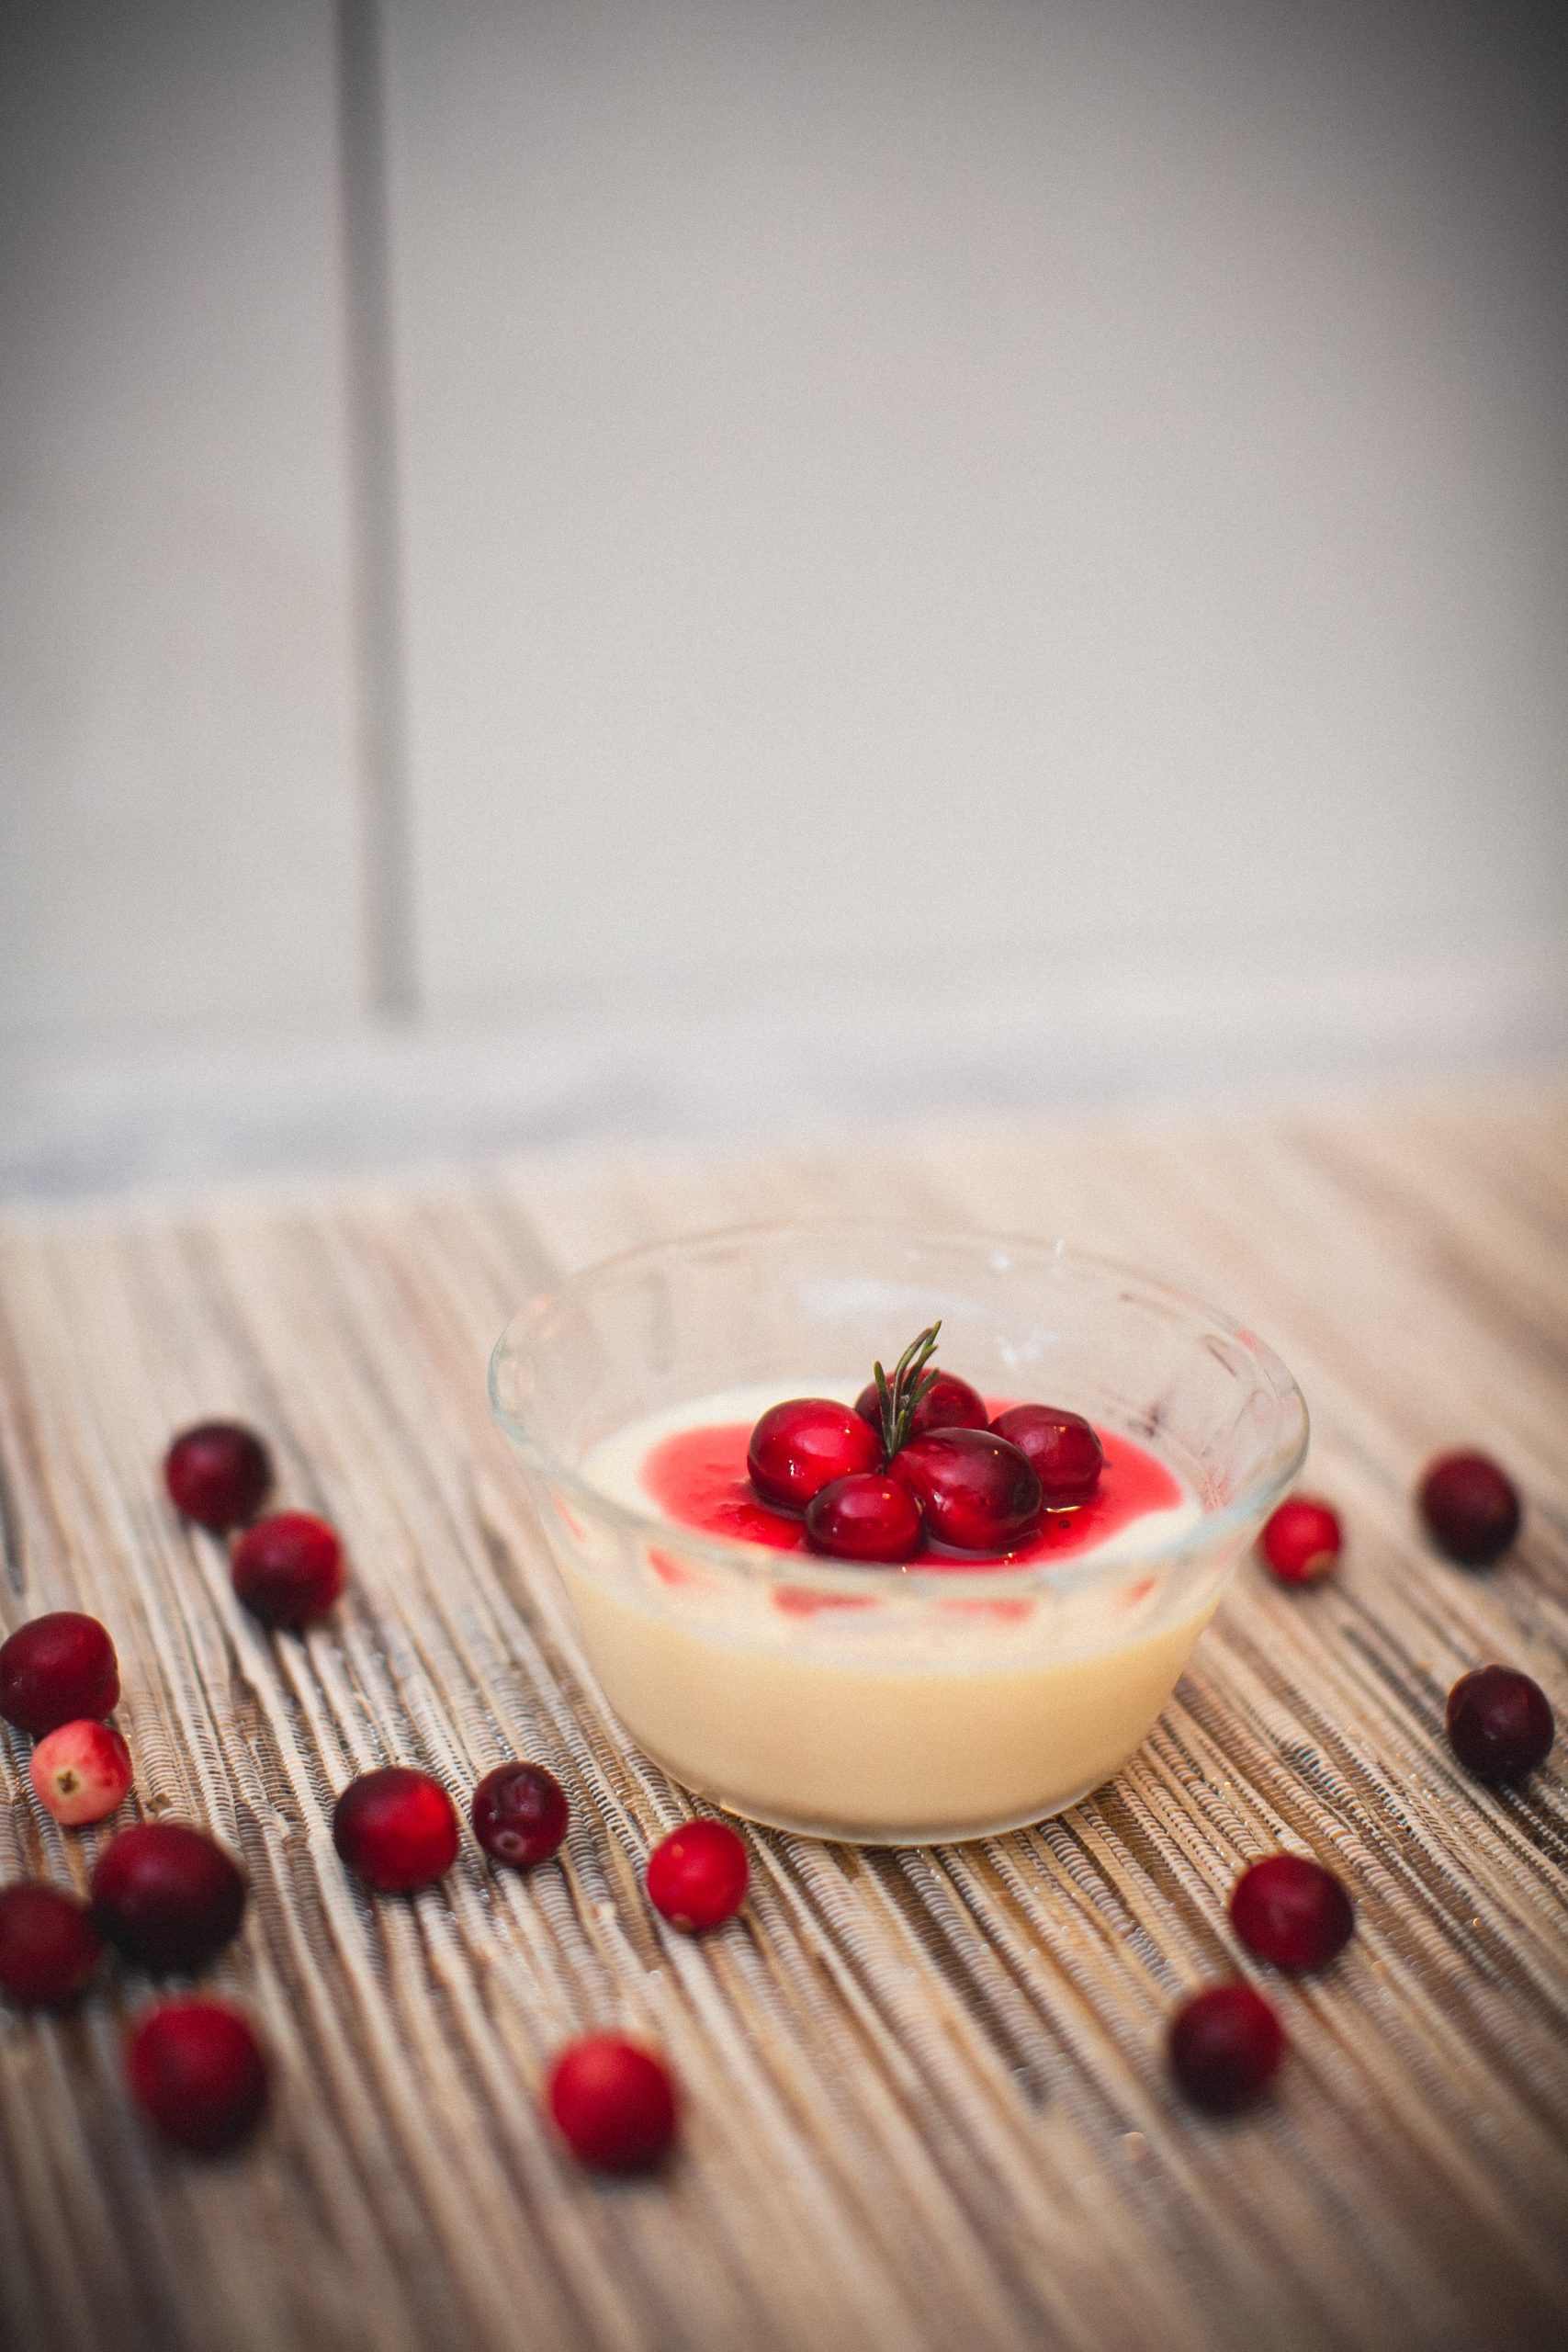
Reasons for including Panna Cotta Cups include: Panna cotta is a small white silken pudding that can be stored for 3 days in the fridge and appears like a $9 dessert from a restaurant.
To begin, pour 1½ teaspoons of unflavored gelatin into a small bowl and add 2 tablespoons of cold water. Leave this mixture for 5 minutes so the gelatin can soften. In the meantime, whip together 2 cups of heavy cream, ½ a cup of sugar, 1 teaspoon of vanilla bean paste (or the seeds from one split vanilla bean), and a pinch of salt. After the cream mixture is whipped, it should be heated until it just starts to simmer (make sure it does not boil). After removing the cream mixture from the heat, stir the softened gelatin into the mixture and whisk until all of it is dissolved.
Divide the mixture evenly into 8 small glasses, bottles, or ramekins. Chill them in the refrigerator for at least 4 hours (overnight is better). Right before serving, add the berry coulis or sliced strawberries on top. You should tap the glass and feel a slight jiggle.
Swap: This can be enhanced by substituting half of the cream for buttermilk. The same set is ever so slightly weaker, but still remarkably more engaging.
26) Mini Brownie Bites
Mini Brownie Bites require justification. A small brownie bite is a chocolate dessert that fits the color scheme. Treats are cut into one inch squares and dusted with powdered sugar.
In a saucepan combine 1 cup of butter and 8 ounces of semi-sweet chocolate. Heat and stir over low until butter and chocolate are melted. Remove from heat and add sugar, vanilla, and eggs (one at a time). For the dry ingredients add 1 cup of flour and 1 teaspoon of salt into a separate bowl and mix in 1/2 cup of chocolate chips.
Combine chocolate mixture with dry ingredients and pour into a square pan with parchment paper. Bake for 28 to 32 minutes at 350°F. A shiny and crackly top should form. Once done, a toothpick should have a few moist crumbs (no wet batter) when inserted. Cool completely. Cut into thirty-six 1-inch squares. Each should be dusted with powdered sugar or have a small buttercream piped on. These can be stored in an airtight container for 4 days.
For any brownie mix, add a quarter cup of espresso. It saves 15 minutes, enhances the chocolate flavor, and no one even notices.
27) Strawberry Meringue Kisses
What does this bring to the table: The pink meringue kisses are purely decorative. A whole bowl is about $2 and they are crunchy and practically weightless.
Combine a small amount of cream of tartar and the 4 egg whites and beat until a foam has formed. Gradually add 1 cup of caster sugar to the egg whites, 1 tablespoon at a time, continuing to beat until stiff glossy peaks have formed. Add 1 teaspoon of vanilla and lightly fold in a few drops of pink gel food coloring. To add a strawberry flavour, 1 teaspoon of freeze-dried strawberry powder can be added (optional).
With a star tip, pipe small kisses (approx. 1 inch wide) onto sheets lined with parchment paper. After 90 minutes, turn the oven off and leave the kisses to dry for 1 more hour. The kisses should be easily removed from the parchment paper. Store in an airtight container at room temperature for 2 weeks.
For a two-tone color story, one side can be tinted to a pale pink and the other side to a white. Another alternative is to stripe the inside of your piping bag with some red gel color for a marbled pink effect.
28) Mini Tiramisu Cups
Where Mini Tiramisu Cups earn their spot: Mini tiramisu served in small cups will provide the coffee-and-cream element that no other dessert will bring to the table.
In a double boiler, combine the egg yolks with sugar, and with a hand mixer, beat for approximately 5-6 minutes. The mixture should become thick and turn light in color. Allow it to cool to room temperature. Beat the mascarpone (8oz) with 1 tsp of vanilla until smooth, and then combine it with the yolk mixture. Whip the cream to soft peaks, then fold it in.
Brew 1 cup of espresso, and add 2 tablespoons of coffee liqueur (optional). Dip the ladyfingers in coffee for 1 second, then layer the cups. For each of the 12 small cups, add a layer of the coffee-dipped ladyfingers and then a layer of the mascarpone cream, finally dust with cocoa powder. For the best results, let it sit in the refrigerator for at least 4 hours or even overnight. It will stay fresh in the fridge for 2 days.
Nathaniel’s Pantry Notes: Tricks of the Trade (Inexpensive Stylist Tricks)
- Use at least three different heights. One tall (tiered cake stand or tall styled vessel), one medium (footed plates or small inverted bowls topped with plates), and one low (the table). Each height should hold different desserts.
- Tall holds the focal dessert. Most photogenic platters like towers of cupcakes, and cake should be placed up top. The eye goes to tall first! So that should be the PRETTIEST.
- Medium is best for multiples. Grouping in clusters of macaroons, brownies, mini cupcakes, cookies, and desserts also requires space to spread without feeling crowded.
- Low will hold the loose pieces. Mints in a bowl, berries scattered, fruit, drinking glasses anything that is not the focus, but so serves as an accompaniment.
29) White Chocolate Bark
What makes White Chocolate Bark stand out? Beautiful sheets of broken white chocolate bark with a mix of dried fruit and nuts. It’s quick, looks great on a wooden board, and is cheaper than some of the other options.
Melt 16 ounces of white chocolate using either a microwave (20-second intervals) as you do NOT want to use candy melts. Instead, use Ghirardelli or Callebaut. Once the chocolate is melted, pour it onto a sheet pan lined with parchment paper, then spread it out until it is about ¼ inch thick. When the chocolate is firm, sprinkle on some toppings.
Good choices are: chopped mild or slivered warm nuts, freeze-dried raspberries, edible gold (or dust) leaves, and (or) sanding sugar. Once that is complete, allow it to harden in the fridge for 20 to 30 minutes. You then shatter it by hand (this is the purpose of chocolate to be shattered). Finally, you can keep the pieces at room temperature in an airtight container for 2 weeks or less to allow for long-term storage and can even create white and dark chocolate marble chocolate to make bark look really cool (this looks less like a bridal color).
30) Mini Scones
Mini scone with clotted cream and jam can also be considered to be placed on the table. The format and style accompaniments everything.
In a large bowl, mix the dry ingredients well: 2 cups of all-purpose flour, ⅓ cup sugar, 1 tablespoon baking powder and ½ teaspoon of salt. Take butter from the fridge and cut it into small cubes and add it to the bowl with ½ cup of heavy cream and 1 egg. Knead 4 to 5 times on a floured surface and shape the dough into a circle about 1 inch thick.
Cut the circle into 8 wedges, and to make 16 mini scones, cut each wedge in half. Brush with cream and sprinkle turbinado sugar on top. Bake for 13-15 minutes on 400 degrees Fahrenheit, or until a light golden brown. Serve with small jars of clotted cream (or whipped cream) and strawberry jam. For maximum sweetness, serve the same day!
In your dough, you can also add ⅔ cup of dried currants, some lemon zest, or a teaspoon of lavender. Follow the same method, and improve the character.
31) Mini Fruit Tartlets
Why Mini Fruit Tartlets belong here: Mini fruit tartlets are the equivalent of a magazine cover. The pastry cream is the base and the fruit is the top.
Extend the baking time to 8-10 mins until the crust turns a light tan color so it will be easier to slice later. Place egg yolks, sugar, corn starch, and a pinch of salt into a bowl. Heat milk so it is almost at a boil. Combine yolk mixture with milk. Place back on the stovetop on medium-low heat, stirring constantly for 5 mins. Once mixture is thickened, remove from heat and add butter and vanilla. To prevent a “skin” from forming, place plastic wrap right on top of the mixture.
Use a piping bag to fill all the tarts. Be sure to dry the tarts completely before filling them, or they will get soggy. For the top, use fruit arranged in rosettes/circles with apricot glaze over the top. You will want to do this 4 hour before serving.
Shelf life: 4 hours. Assembled shelf life with chocolate/ganache or lemon curd: 8 hours
The dessert I keep coming back to is the strawberry shortcake. Coffee cups in mason jars look classy and can sit on your table for 3-4 hours, and they can use any pound cake that is on sale at the store.
For myself, I like to use a different recipe, mini pavlovas, which is 10% effort and 90% reward because on Friday evening, you do all the hard work of preparing the egg whites and sugar, and then come Saturday morning, you just have to add cream and berries and then sit back and relax while four people are begging for the recipe.
These are a good start, and if you want to, you can leave the rest of the list here until the next time you love someone who gets engaged.